
Logging incoming serial data using PuTTY
When you have problems getting a device over the serial port to work, or in cases where you want your own plugin to be developed by us, our support desk will sometimes ask to log some data from your serial port. This document is created to show you step by step instructions on how to accomplish this.
PuTTY is an SSH and telnet client, developed originally by Simon Tatham for the Windows platform. PuTTY is open source software that is available with source code and is developed and supported by a group of volunteers. In addition to some network protocols, it is also a very good and lightweight tool to monitor your serial ports. The software can be run directly without running an installer and is easy to use.
Download and install PuTTY
PuTTY for Windows can be downloaded free of charge from https://www.chiark.greenend.org.uk/~sgtatham/putty/latest.html. Depending on the Windows operating system you are using, download the 32 or 64 bit putty.exe or puttytel.exe file. You can save the file and run it directly after downloading completes.
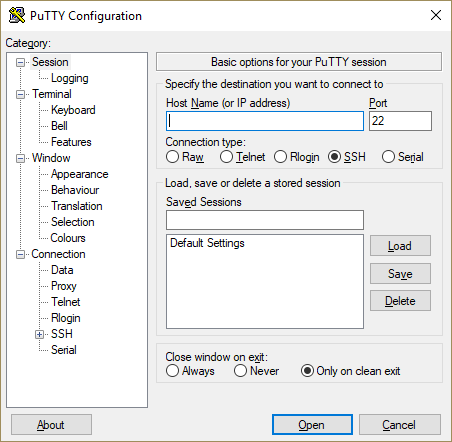
The following startup screen will be shown after launching puTTY.
Connecting to a serial port
To connect to a serial port, select the 'Serial' radio button and enter the serial port number as well as the baud rate. If you do not know the baud rate, no worries, you can change it later on. The most commonly used baud rates are 4800, 9600, 19200, 38400 and 115200 bps.
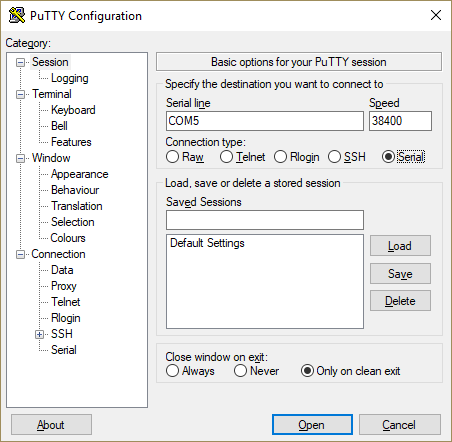
Select the 'Serial' radio button to select a serial port.
After setting this information, click 'Open' to open the serial port.
If the port is present and not in use by another application, you should see a terminal screen displaying the data that is coming in.
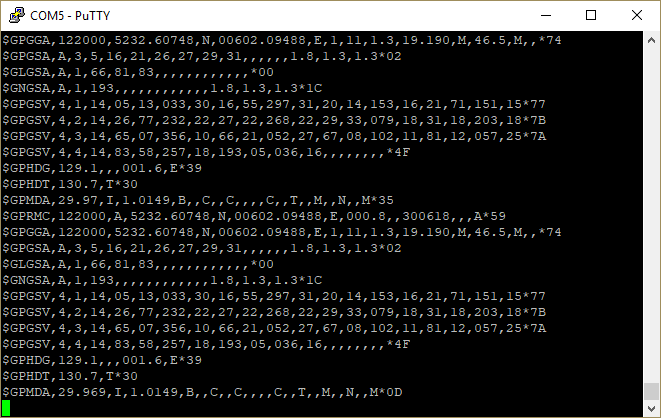
The PuTTY console windows should display the incoming serial data.
Changing serial port options
When the incoming data is not readable, this might have two causes:
- Device outputs binary data instead of ASCII;
- Device outputs ASCII data, however, the serial baud rate or data format setting is incorrect;
The second problem can be fixed by changing the baud rate or the data format. The second is unlikely because most devices are using the N81 data format which is selected by default. To change the serial settings, click the system menu (the upper left icon in the window caption) and select 'Change Settings...'. Next select 'Serial' to open the serial settings. After changing the baud rate, click 'Apply' to see if it fixes, the problem. If not, repeat this step until you get readable data.
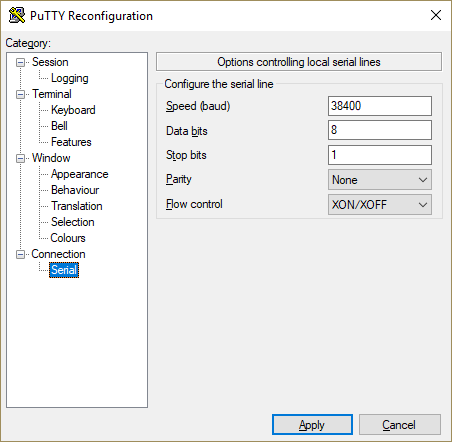
You can modify the serial port setting during a puTTY session.
Logging serial port data
When the incoming data looks correct, we can start logging the incoming serial port data. To start logging, we have to alter the logging options in PuTTY. To change these settings, click the system menu (the upper left icon in the window caption) and select 'Change Settings...'. Next select 'Logging' to open the logging options.
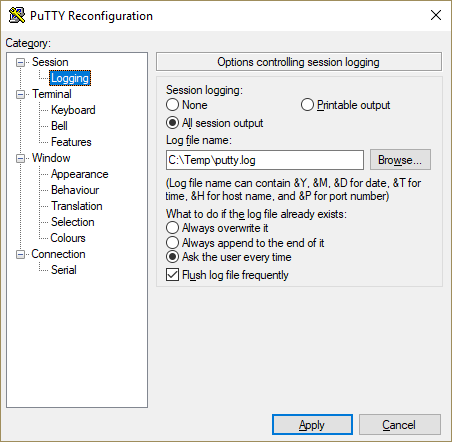
Configure logging settings in puTTY.
First enable the logging by changing the 'session logging' setting from 'None' to 'All session output'. This means that all information displayed in the console window will also be written to the selected file. Secondly, click the 'Browse...' button and select a location and filename where you want to go write the serial data to. Finally click 'Apply' to save the options and start logging.
The resulting logfile
When you collected enough data, you can close the terminal window and PuTTy will unload while closing the logfile.
This logfile can be found on the location you selected in the logging options, and opened with a simple text editor such as 'NotePad'.
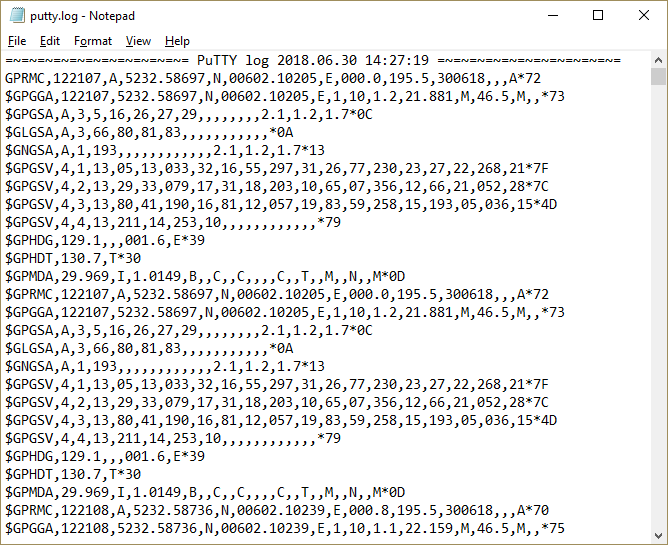
Resulting log file created using puTTY.