
Kongsberg EA4xx series plugin
The Kongsberg EA4xx series plugin allows you to connect either the Kongsberg EA400 or EA440 echo sounder. The plugin listens on the UDP ports used by the echo sounder and converts the received data to depths and water column data.
The following devices can be used with this plugin:
- Kongsberg EA400;
- Kongsberg EA440;
Loading the Kongsberg EA4xx Series Plugin
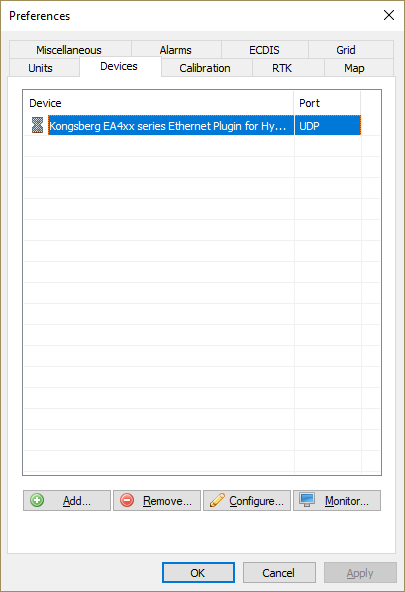
To load this plugin, open the preferences window by selecting "Preferences..." from the "Options" menu. In the window that appears, select the "Devices" tab. Next click the "Add..." button.
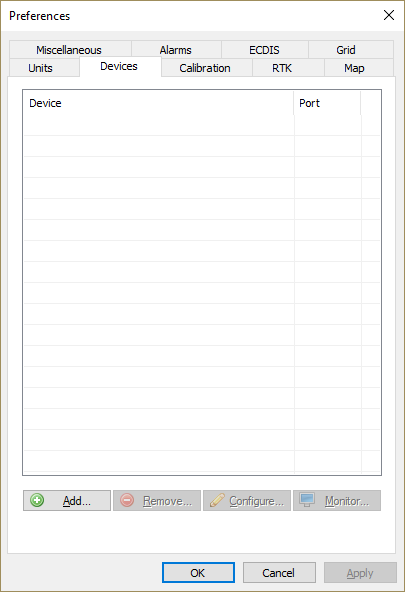
Select the "Devices" tab in the "Preferences" dialog.
A list of available plugins will be displayed. In this list, select the "Kongsberg EA4xx series Ethernet Plugin for Hydromagic" and click "OK" to load and display the plugin's configuration window.
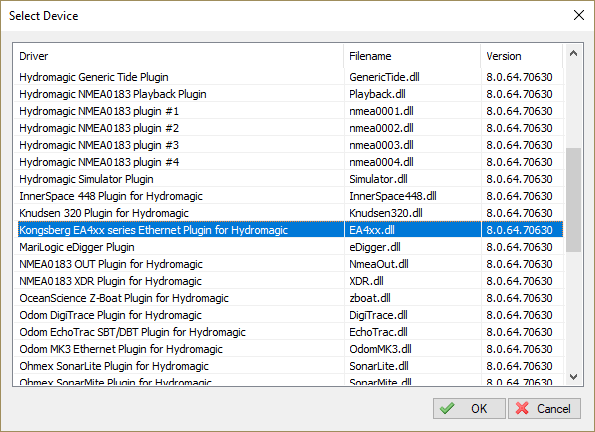
Select the "Kongsberg EA4xx series" plugin.
Configuring the plugin
When the plugin is selected and loaded, the configuration dialog for the plugin will be shown. In almost all cases you can use the default settings. It could be that UDP port 20000 is already in use. If this is the case, please try a different port number (you have to change port this in the EA4xx software as well - see next paragraphs).
Use the channel assignment to associated a transducer channel with either the high- or low-frequency depth. How to set this up depends on the echo sounder configuration. In most cases the first channel is connected to the high-frequency transducer and the second channel to the low-frequency transducer.
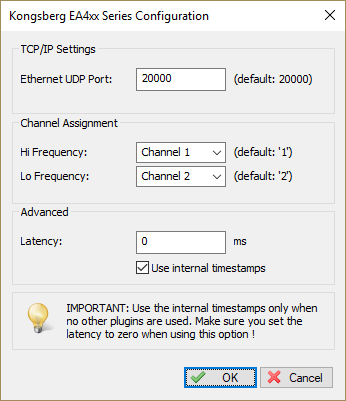
Accepting the default values should suffice.
Configuring the EA440 software (I/O)
In order to receive data from the sounder, the EA440 software has to be started and configured. Double-click the 'EA440' icon on your Start Menu, desktop or taskbar to start the software.
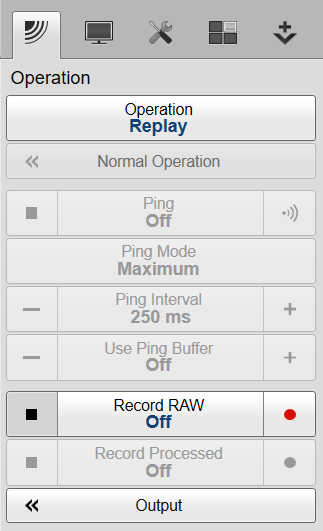
First we have to set the sounder to 'Inactive' because it is not possible to change output settings when the sounder is in 'Demo' or 'Active' mode. To do so, select the leftmost tab in the pane on the right side of the screen, and change the "Operation" setting.
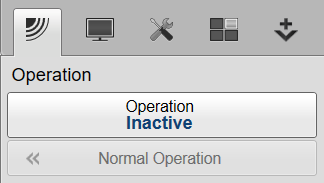
Set to 'Inactive'.
When done, select the middle tab (with the tools on it), and click the 'Installation' button. In the dialog that appears, select the 'I/O Setup' item on the left. The I/O Setup tab now appears. Click the "Add..." button directly below the list of ports in the "LAN Ports" section.
A new entry is created called 'LAN Port 2', with IP Address 127.0.0.1 and Port 20000. When Hydromagic is not running on the same computer, select the new entry, click "Setup" and change the IP address to the one used by the computer running Hydromagic. When completed, click "Apply" and "OK" to save the changes.
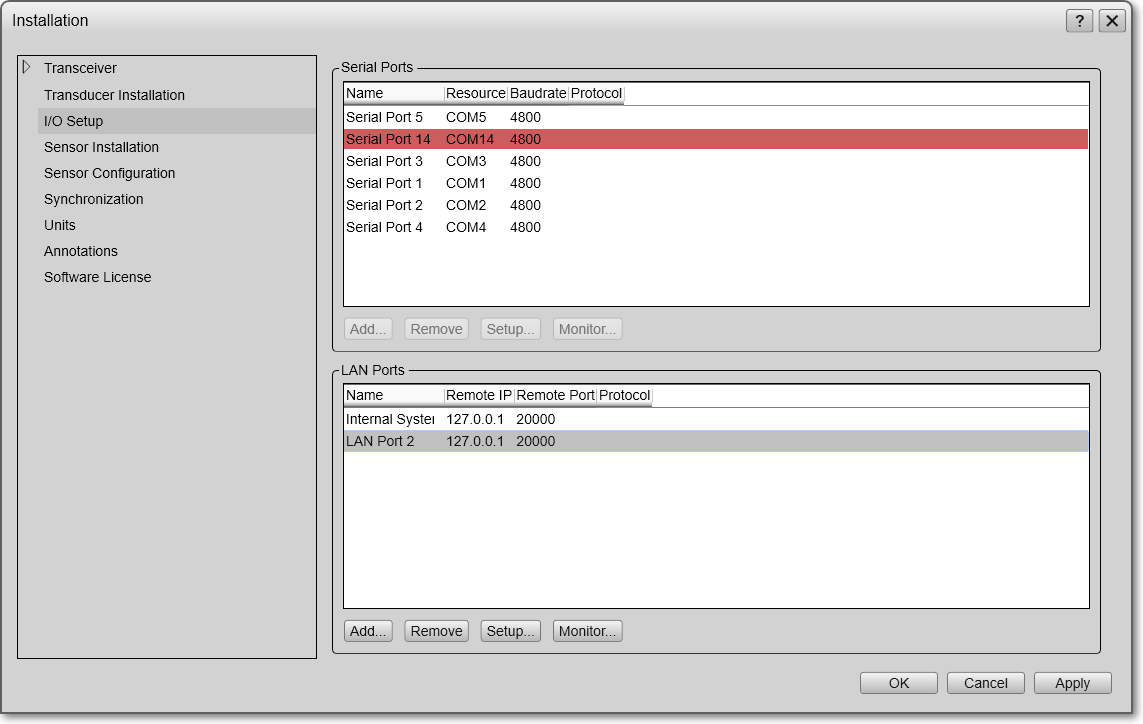
Configure a new LAN port so Hydromagic can read data from the sounder.
Configuring the EA440 software (Echogram)
Next, return to the first tab, and change the Operation setting back to 'Normal', or 'Replay' when the sounder isn't connected. After doing so, the 'Output' button will be enabled. Click the 'Output' button to configure the output format.
Click the "Output" button.
We will now configure the echogram output. Select the 'Processed Data Output' option in the screen that appears. The only item in the 'Installed Outputs' list should be 'New' which can be used to add a new output. Select the 'New' item, and proceed to the section on the right. From the drop down box at the top of this section, select the 'Echogram' option.
In the 'Output Destination' section, check the 'Port' radio and select the I/O port we created earlier, which is most likely called 'LAN Port 2'. Select the channels you want to output. Please note that Hydromagic can only process one low frequency and one high frequency channel. When there are only one or two transducers listed, just check all.
For the TVG, select the '20 Log TVG' option. The other options just won't work. In the Range setting, click the buttons to set the range for the Surface and Bottom. Hydromagic will only use the surface samples (when bottom is not used, the surface samples will cover the whole water column).
In the value section, set the number of samples for surface to 500 and the bottom sample count to 0. When finished, do not forget to click the 'Add' button to store this output profile. When starting the sounder or a simulation, the data should now be displayed in Hydromagic.
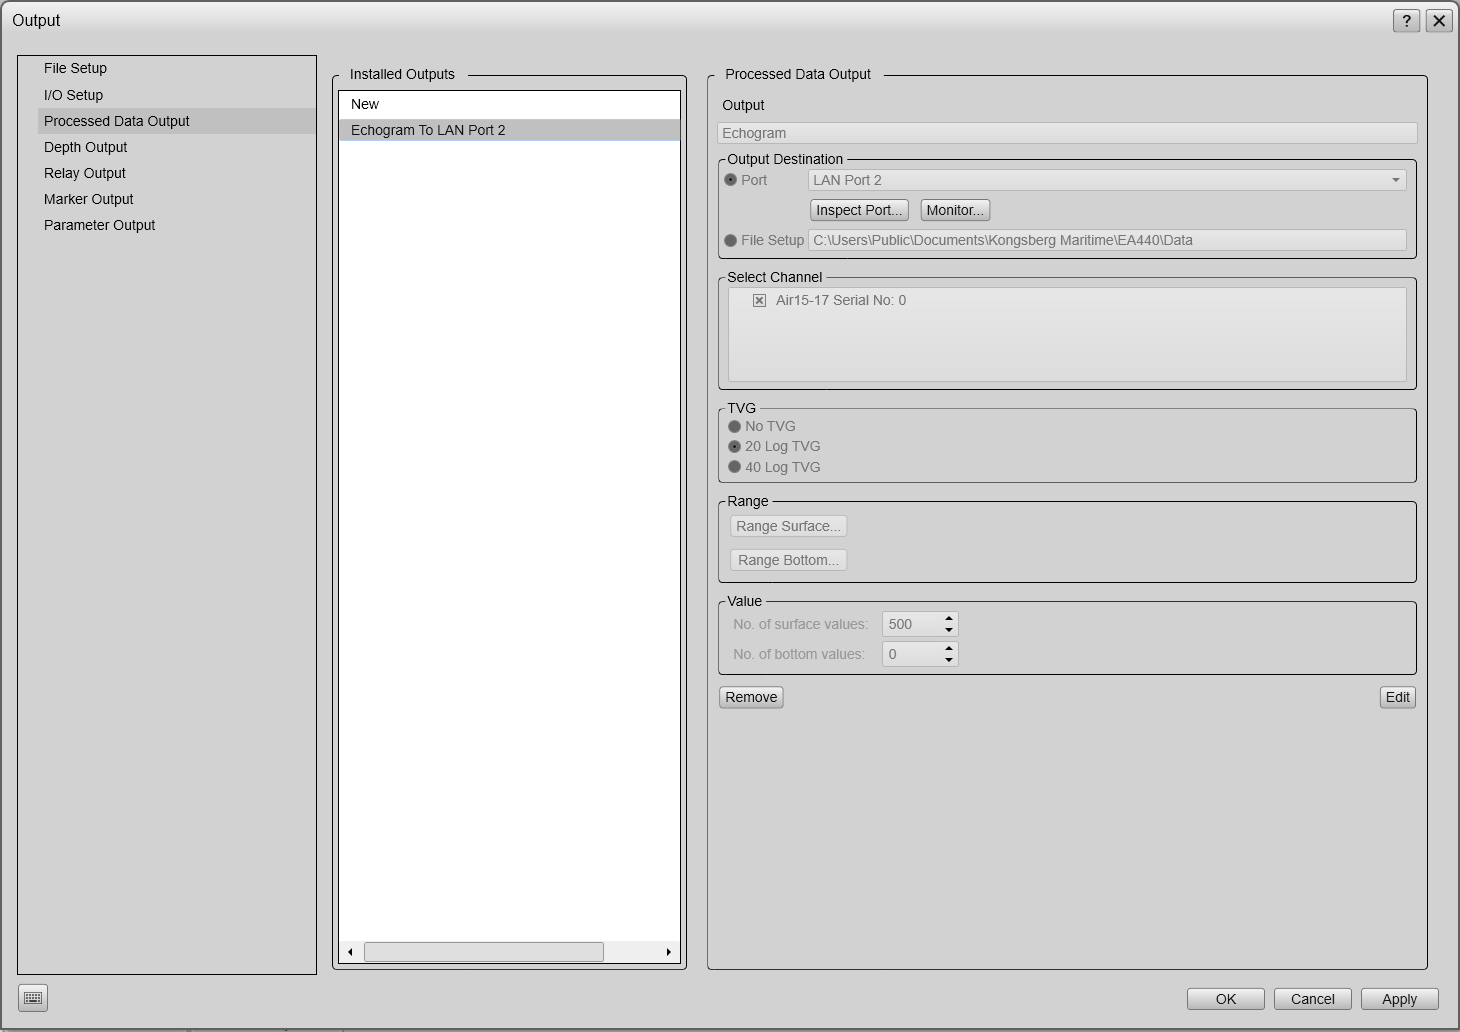
Configure the output format to be used (echogram).
Configuring the EA440 software (Digitized Depth)
Next, return to the first tab, and change the Operation setting back to 'Normal' or 'Replay' when the sounder isn't connected. After doing so, the 'Output' button will be enabled. Click the 'Output' button to configure the output format.
Click the "Output" button.
We will now configure the digitized depth output. Select the 'Depth Output' option in the screen that appears. The only item in the 'Installed Outputs' list should be 'New' which can be used to add a new output. Select the 'New' and proceed to the section on the right. From the drop down box at the top of this section, select the 'SimradBinary' option.
In the 'Output Destination' section, check the 'Port' radio and select the I/O port we created earlier, which is most likely called 'LAN Port 2'. Select the channels you want to output. Please note that Hydromagic can only process one low-frequency and one high-frequency channel When there are only one or two transducers listed, just check all.

Configure the output format to be used (digitized depth).
Testing the plugin
When the EA440 software has been configured you should see depth data displayed in the data view. If not, you can perform the following steps:
Open the preferences window by selecting "Preferences..." from the "Options" menu. In the window that appears, select the "Devices" tab. Next select the "Kongsberg EA4xx Series Ethernet Plugin for Hydromagic" and click the "Monitor..." button. The communication monitor appears, and should display two different packets coming in as shown below:
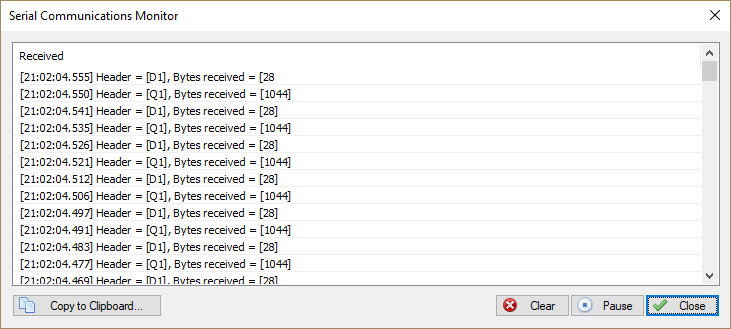
Use the communications monitor to check whether network data is received.
When the packet starting with 'Q1' or 'Q2' is received, it means that the echogram data has been setup correctly. When the packet starting with 'D1' or 'D2' is received, it means that the digitized depth data has been setup correctly. When neither of those two appear, most likely there is a problem with the configuration. In some cases you have to select another UDP port for LAN Port 2 (for instance 20002).
To check the incoming echogram data, select the 'Echogram (Hi)' or 'Echogram (Lo)' option from the View menu. The echogram should look like this:
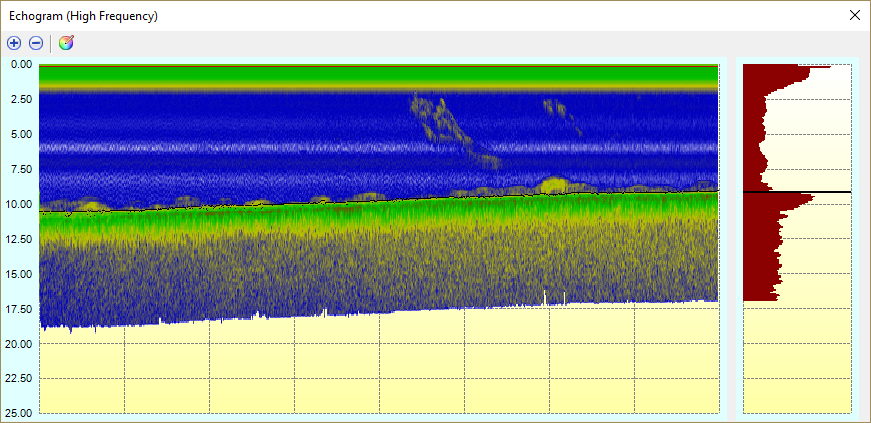
The echo return envelope should be displayed in the echogram window(s).
Unloading the plugin
To unload the plugin, open the preferences window by selecting "Preferences..." from the "Options" menu. In the window that appears, select the "Devices" tab. Next select the "Kongsberg EA4xx Series Ethernet Plugin for Hydromagic" and click the "Remove..." button.
Select the plugin and click "Remove..." to unload.