
Map Footer
A map footer is a section with text displayed in the lower-left corner of the map view from Hydromagic Survey or Hydromagic Dredging. This footer can contain basic information about your Hydromagic project, such as the surveyor's name, dredge operator's name, project description, date, or the units and projection used.
You can choose whether you want to include a map footer on your exported or printed map views or not. By default, this option is disabled since the map footer content needs to be configured first.

Example of a map footer added by Hydromagic on exporting your screen.
Modifying map footer settings
To access the map footer settings, first select the 'Preferences...' item from the 'Options' menu to open the Preferences dialog. In the preferences dialog, select the "Miscellaneous" tab, and click the "Setup..." button in the "Map Footer" section as shown below:
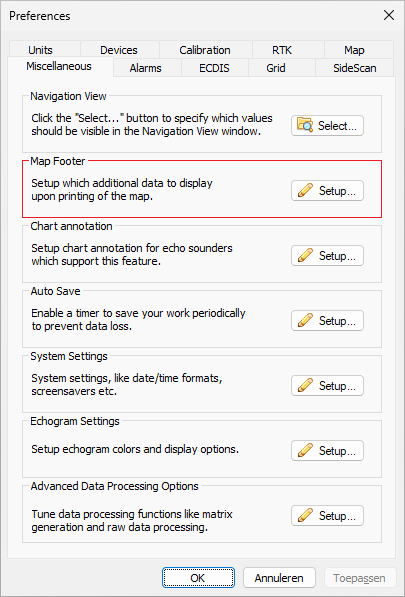
The map footer configuration can be found
under the "Miscellaneous" tab.
Configuring the map footer content
The first five lines (two lines in versions prior to 9.4) of text in the map footer can contain static text combined with placeholders (optional). Static text is displayed exactly as entered. If one or more lines are left blank, they will not be drawn. For instance, when you only enter two lines of text, the map footer should look like the example at the top of this page.
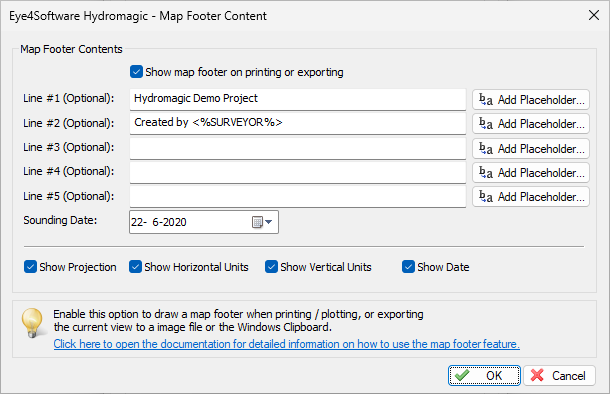
The map footer content settings dialog.
When inserting a placeholder, it will be replaced with a project variable when the map view is exported or printed. To insert one of the placeholders that are recognized by the software, just click the "Add Placeholder..." button for that line. When one of the "Add Placeholder..." buttons has been clicked, the "Select Placeholder" dialog will be shown. Select an item from the list and click 'OK' to insert the placeholder into your line of text. You can copy and paste placeholders to different lines and use multiple placeholders per line.
Placeholder selection dialog
The various placeholders can be found in this dialog, along with an explanation of how they will be replaced with project variables when printing or exporting. Select an item and click "OK" to insert, or just double-click the required placeholder.
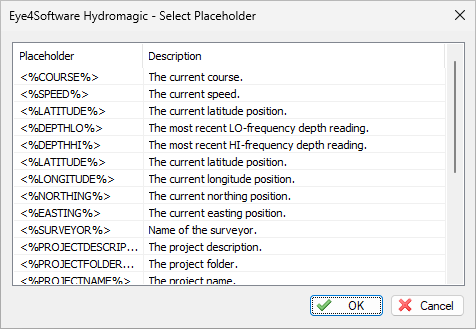
The placeholder selection dialog.
Map footer optional settings
Sounding date
To include the sounding date in the map footer, ensure the 'Show Date' checkbox is checked. Next click the date selection control to select which date to display in the footer. You will usually select the date on which the sounding was performed. By default, today's date is selected. To configure how the date will be formatted, please refer to the "Time Formats" section at the end of the System Options manual page.
Show horizontal units
Include the horizontal units (Easting and Northing) used in the coordinate reference system in the map footer.
Show vertical units
Include the vertical units (depth, tide, and elevation) used in the coordinate reference system in the map footer.
Show Local Grid
Checking this checkbox includes the local coordinate reference system name in the map footer.