
Creating boundaries
A boundary is required when using volume calculations or to specify a clipping region when generating a matrix or when exporting matrix data. The easiest way to create a boundary is by drawing a polygon on the map, but it is also possible to enter the coordinates manually. When the coordinates which make up the boundary are available in a text file, you can import them from the ASCII data file as well. Boundaries are also used when you want the software to automatically generate cross sections for a body of water.
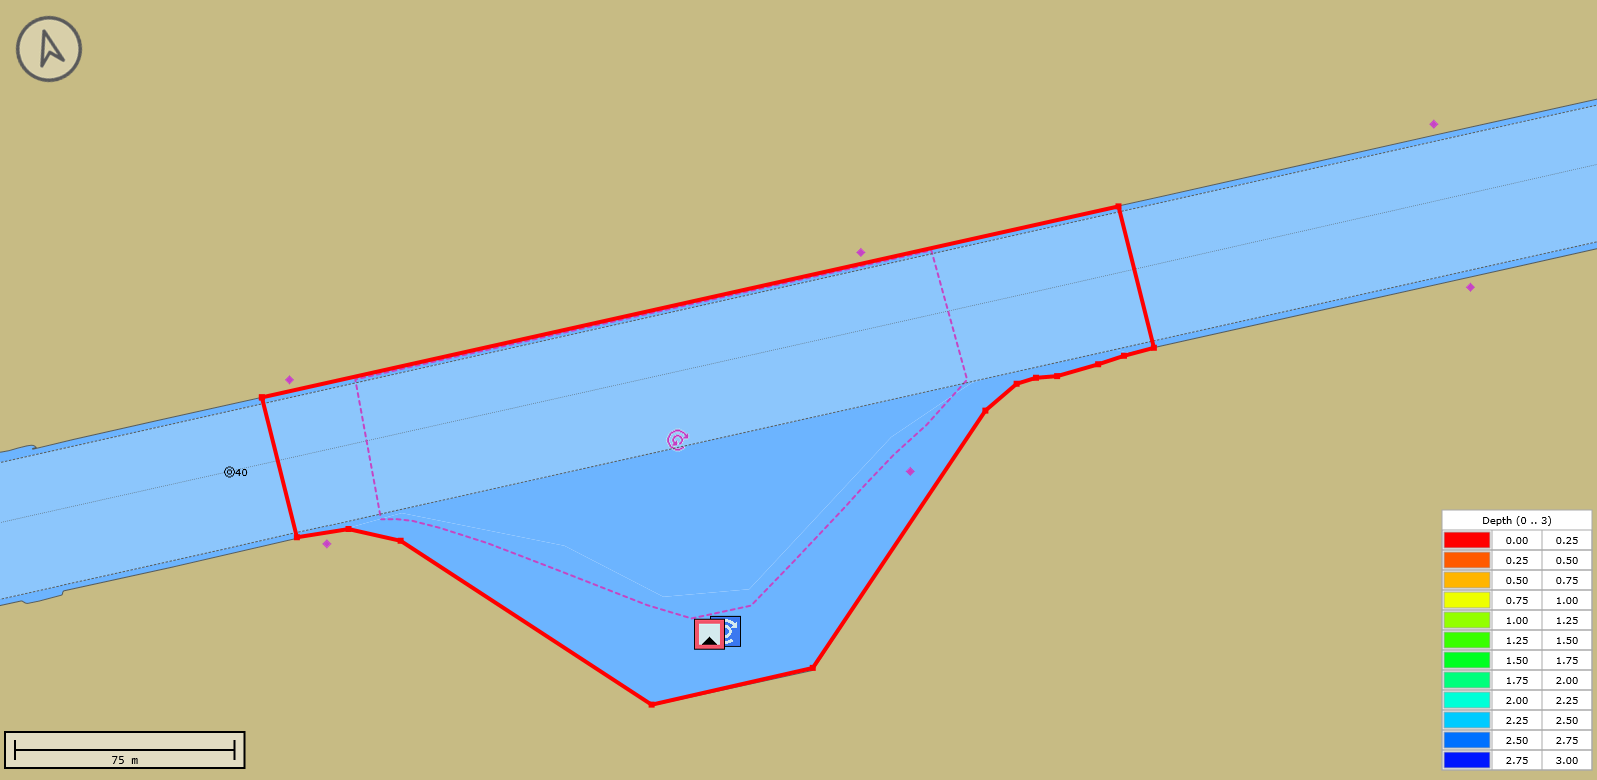
Example boundary used to create cross sections (displayed in red).
Create by using the mouse
To start a new boundary, make sure that the "Project Explorer" is visible. In the "Project Explorer", locate and right-click the "Boundaries" folder and select the " Draw Boundary..." option from the popup menu which appears. After selecting this function, the mouse mode has now been switched to boundary drawing mode, which means that you can simply click the points which make up the boundary in the map display.
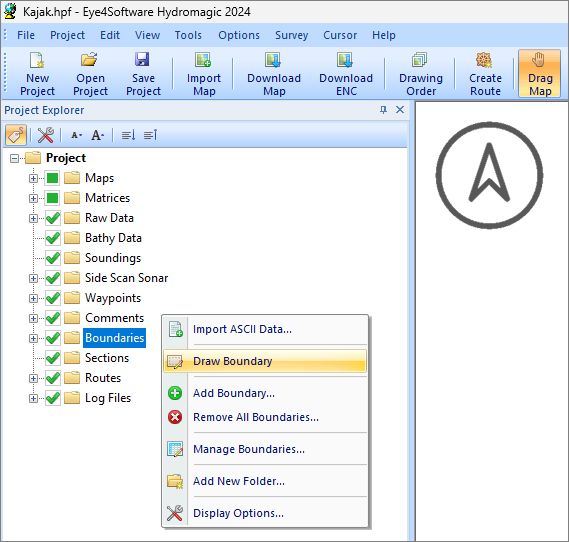
The function to draw a boundary using the mouse can be accessed from the "Project Explorer".
When you selected all the points of the boundary, you can save the boundary by clicking the right mouse button. A window will appear containing all points you selected, so you have the chance to alter or remove positions, or to change the name and comment for the newly created boundary. The newly created boundary will also appear in the "Project Explorer". By default, a new boundary is named 'BOUNDARYXXXX,' where 'XXXX' is the number of the boundary. Boundaries are drawn as red lines. The boundary points are drawn as red rectangles (depending on the display options, see below).
Modify by using the mouse
To modify a created boundary, regardless of whether it was created by entering coordinates or using the mouse or imported, can be modified by dragging corner points around. First, you have to activate the boundary you want to alter. This can be done by right-clicking on the boundary name in the "Project Explorer", and selecting the "Set Active" option. It is only possible to drag the points around when boundary is activated (when activated it is drawn as a dashed line).
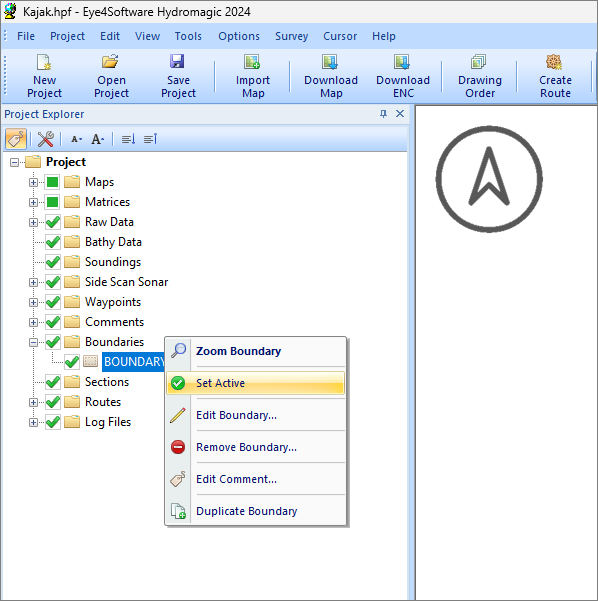
Before you drag and drop coordinates, the boundary needs to be activated.
Create by entering coordinates
If your client has supplied a list of coordinates for the area you need to survey, you can create a boundary by manually entering these coordinates. To do so, right-click the "Boundaries" folder in the "Project Explorer" and select the "Add Boundary..." option. The following dialog will appear:
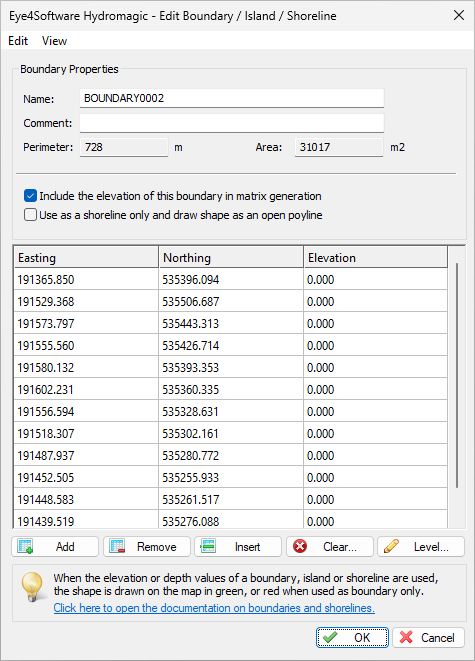
You can edit the boundary coordinates manually or alter the boundary's name.
The table shows the coordinates of the corners of the boundary. The toolbar at the bottom of the dialog allows you to add, insert or delete coordinates. This dialog can also be used to modify boundaries created using the mouse or to rename a previously created boundary:
| Button | Function |
|---|---|
 |
Add a new coordinate to the list. |
 |
Insert a new coordinate before the selected coordinate. |
 |
Delete the selected coordinate(s). |
 |
Clear the list (delete all coordinates). |
 |
Set the depth or elevation of all coordinates. |
Create by importing coordinates from ASCII
When the coordinate data is already present in a text file, you should be able to create the boundary by importing the ASCII file. To do so, select the "Import ASCII..." option from the "File" => "Import" menu. When the ASCII import tool appears, make sure that you set the "import data as" option to "Boundary". Next you select the file containing the coordinate data and make sure the other settings match the file's layout. Finally click "OK" to import the data and create a new boundary.
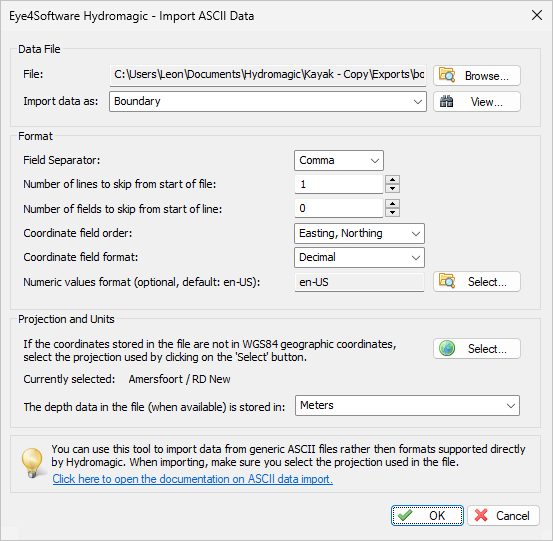
You can import boundary coordinates from an ASCII text file.
Boundary display options
You can customize the way boundaries are displayed on the map. The line color and line width can be changed. You can also choose whether the coordinates are drawn as rectangles or not. The display options can be found in the "Project Explorer". Just right click the "Boundaries" folder and select the "Display Settings..." option from the popup menu.
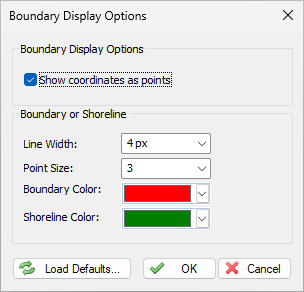
You can change the way boundaries are displayed
Removing a boundary
A boundary can be removed by right-clicking on the boundary name in the "Project Explorer" followed by selecting the "Remove Boundary..." option. After confirmation, the boundary will be removed from the project.
Video Tutorial
The following YouTube video tutorial shows how to draw a new boundary object in Hydromagic. Click below to play the video. When you like the video, please click the like button and subscribe so you will receive an update when new video tutorials on Hydromagic are uploaded.
The following YouTube video tutorial shows how to draw a new boundary object in Hydromagic.