
Hydromagic Route Planner
In Hydromagic, the built-in route planner can be used to combine sections and waypoints into a route. Routes can be used to program autopilots or can be drawn as a map overlay to guide you during surveys.
At this moment the CEE HydroSystems CEEPILOT, Dynautics SPECTRE, and ArduPilot compatible autopilots like the Cube are supported for route uploads. To upload routes directly to this hardware, a plugin needs to be loaded. How to load the plugin is explained in the following paragraph.
It is also possible to upload routes using a 3rd party software package like Mission Planner. To allow the routes to be used in other software packages, Hydromagic can import and export routes in various file formats:
- NMEA0183 ASCII files;
- GPX GPS Exchange data files;
- Keyhole Markup Language (KML) files;
- GQC MavLink / Mission Planner data files;
- ASCII Import/Export files.
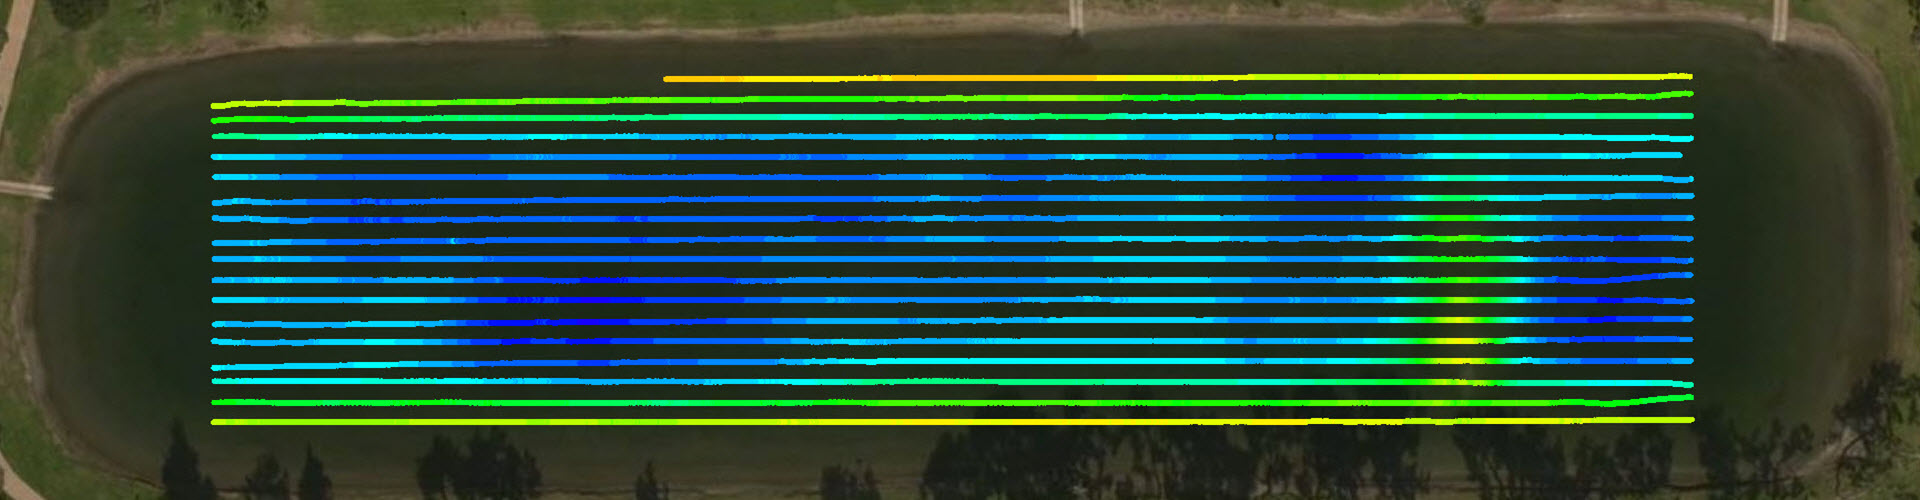
Running laser straight survey lines with for instance the CEE USV equipped with an autopilot
Loading the autopilot plugin
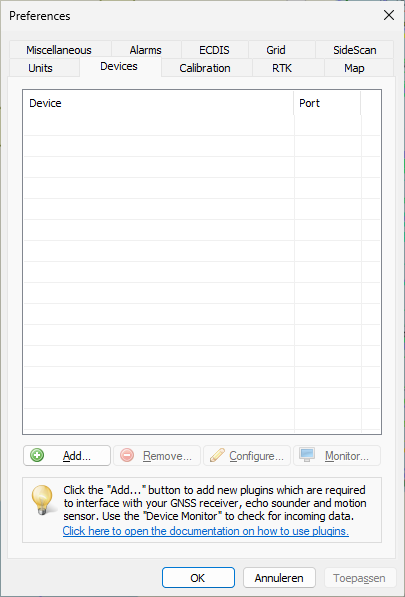
To load the auto pilot plugin for the CEEPILOT, open the preferences window by selecting 'Preferences...' from the 'Options' menu. In the window that appears, select the "Devices" tab. Next click the "Add..." button.
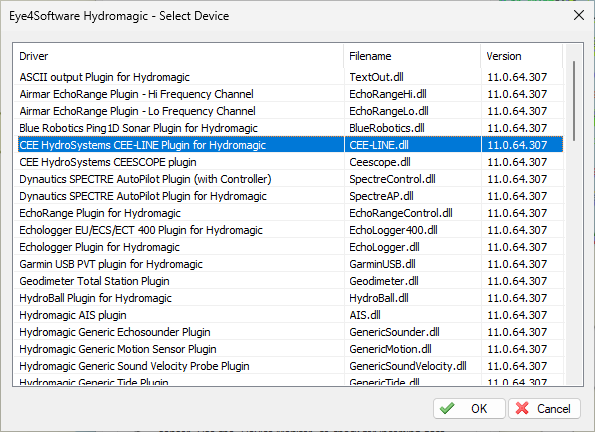
A list of available plugins will be displayed. Select the 'Dynautics SPECTRE AutoPilot Plugin' and click "OK" to load and display the plugin's user interface.
Configuring the autopilot plugin
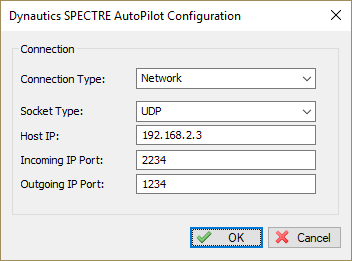
When the plugin loads, a dialog with some required settings will appear first. Since the CEEPILOT is connected via Wi-Fi, enter the network settings (UDP). Make sure the incoming UDP port is set to '2234' and '1234' for the outgoing UDP data. The IP address depends on your wireless network configuration.
Starting the plugin
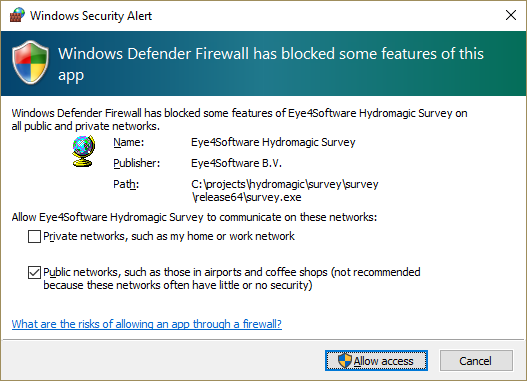
When the ports have been configured, click the "OK" button to save the settings and start the plugin. If the Windows Firewall is enabled on your computer, you will see the following popup window:
Starting the route planner
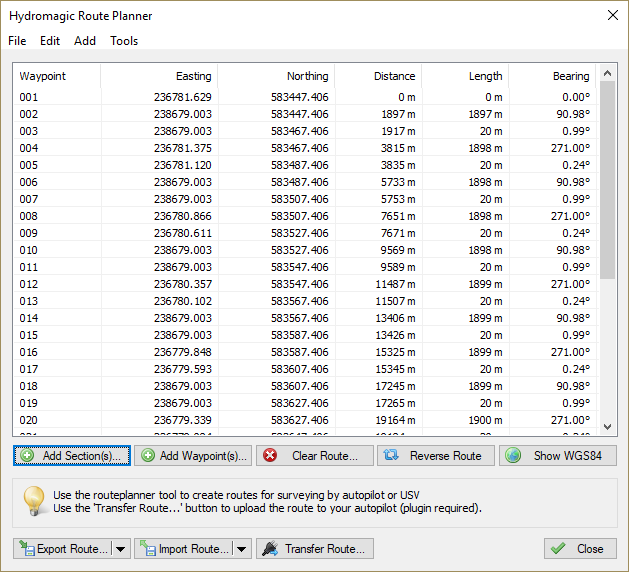
You can start the route planner tool by selecting the 'Router Planner...' option from the 'Tools' menu at the top of the Hydromagic application. A window similar to the screenshot below will appear. When the "Transfer Route..." button is grayed out, it means no autopilot plugin has been loaded.
Creating routes
A route can be created by adding sections and waypoints to the route list. For sections, first the starting point will be added followed by the ending point.
You can reverse sections by right-clicking the section's center in the map and selecting the 'Reverse' option from the popup menu.
To add a section, click the "Add Section(s)..." button. You can select one or multiple sections at once. To add a waypoint, click the 'Add Waypoint(s)...' button. You can select one or multiple waypoints at once.
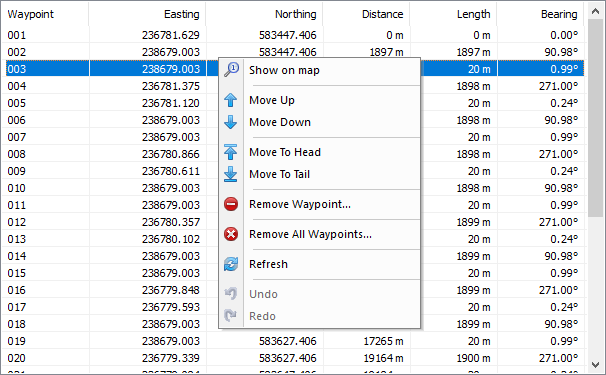
To (re)move route points, right-click the list view for more options:
Importing and exporting route data
The tool offers a couple of options for importing or exporting route files. This functionality is offered to allow you to use other software for route creation or uploading. The import and export options can also be used to transfer routes between different Hydromagic projects.
When you created the route in other software, and you want to show or upload the route in Hydromagic, use the "Import Route..." button. Note that any existing route will be overwritten when a route file is imported.
When the route has been created, and you want to use a third party software tool to upload the route into other hardware, use the "Export Route..." button. Note that all exported coordinates are in the WGS84 coordinate reference system.
Exporting a route to Mission Planner (MavLink)
The route planner could also be used to create routes and send them to MavLink compatible hardware via Mission Planner. If you haven't installed a copy of Mission Planner, you can download it from the ArduPilot website.
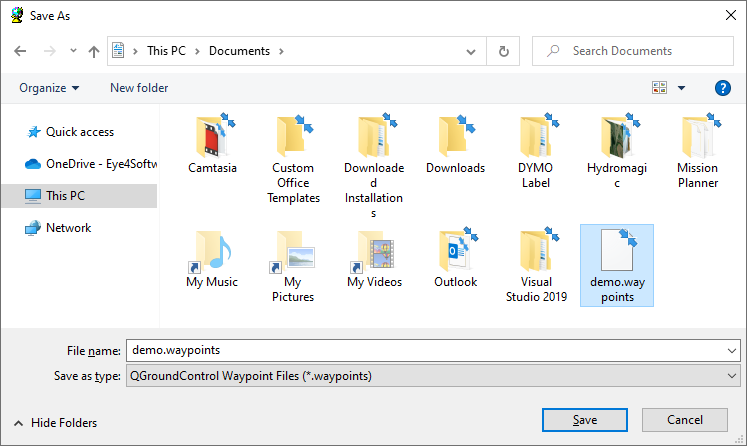
First create your route as explained in this document. After creating the route, click the "Export Route..." button and select the "Export QGC..." option from the dropdown menu. In the "Save As" dialog that appear, choose a filename and save the file.
Start the Mission Planner software and select the 'Flight Plan' mode in the toolbar at the top of the screen. The software will now switch to planning mode and there should appear a new panel at the right hand of your screen.

In this new panel, click the "Load WP File" button and select the QGC waypoints file you just created with Hydromagic.
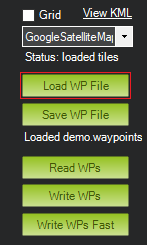
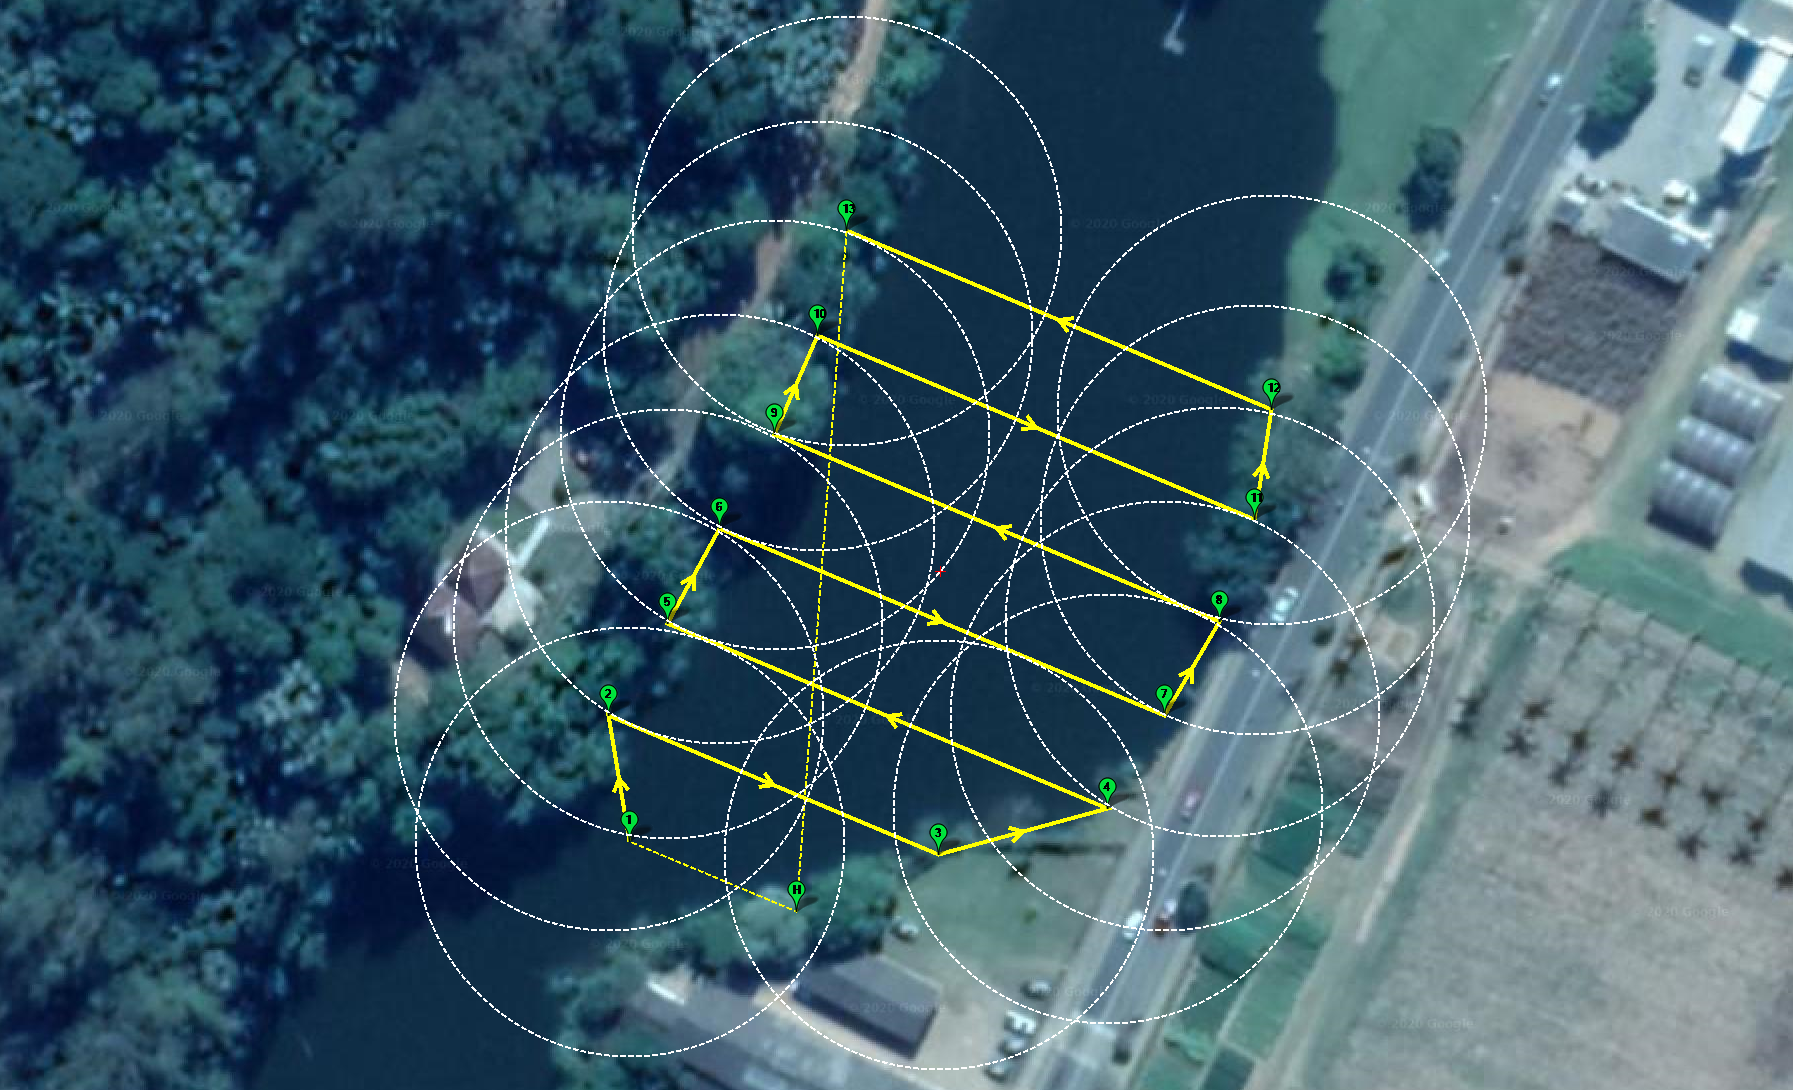
Your route should now be visible as map overlay in Mission Planner. When you have connected a MavLink compatible autopilot, click the 'Write WPs' button to store the waypoints in your autopilot.
Uploading routes
After a route has been entered, you can upload it to the autopilot. Please make sure that you have to specify at least two points. Also make sure to program the point where the USV should return. You can use a waypoint for this.
To start the upload process, click the 'Transfer Route...' button. If this button is grayed out, you must load the 'Dynautics SPECTRE AutoPilot Plugin' first.
After starting the upload, the following progress dialog will be shown, stating which route or waypoint is currently being uploaded. If you contact support with upload issues, please send a screenshot of this dialog.

A route upload log will be shown as a popup or displayed in the Activity Viewer.
Export a route report
After you have imported or created a route, the software allows you to export a report on the generated route, containing run times, leg distances and waypoint numbers. To get the correct run times, you can specify a survey speed used during the survey. To do so, select the "Survey Speed..." option from the "Edit" menu and enter your average speed.
The actual report can be generated in either HTML or PDF format. Launch the report export function by selecting the 'Export Route Report...' function from the 'Tools' menu. When the 'Save As' dialog appears, select the export format with the 'Save as type' selection box. Next, select a file name and click the 'Save' button to generate and view the report.
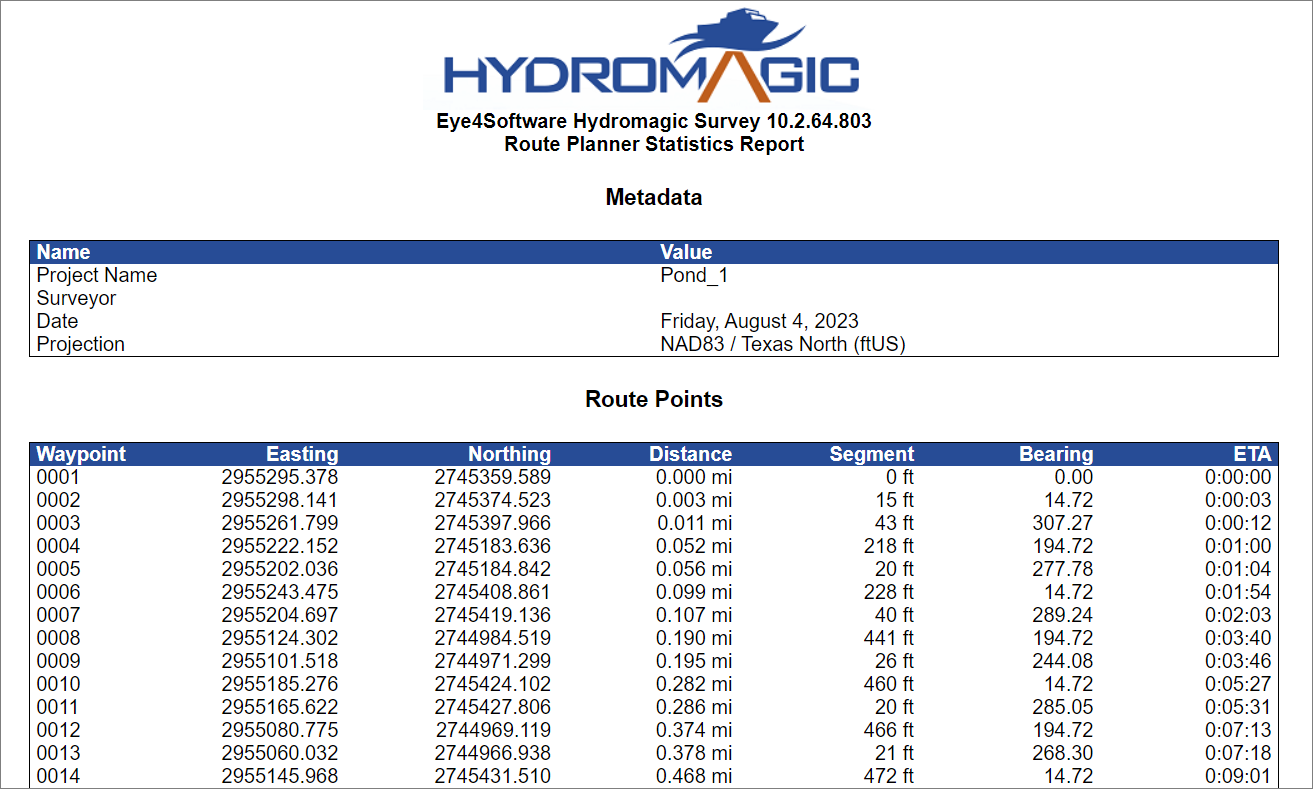
It is possible to generate a route report with run times for each leg.
Video Tutorial
The following video shows how to create sections, convert sections to a route and uploading to the autopilot (source: CEE HydroSystems).