
Emlid Reach RS2
The Emlid Reach RS2 is a multi frequency, multi constellation GNSS receiver, which can be connected to Hydromagic using serial port (RS232), Bluetooth or WiFi. The only thing that has to be done in order to get it to work with Hydromagic is setting up a NMEA0183 output via either a serial cable, Bluetooth or a network connection (WiFi).
Configuring the connection type
There are multiple ways to connect the GNSS receiver with Hydromagic. In most cases Bluetooth is used and you can connect the receiver via a TCP/IP network (WiFi), but it is also possible to connect the receiver using an optional data cable (sold separately). We will discuss all connection types in this tutorial. The receiver is capable of outputting two data streams, so you can use both WiFi and Bluetooth or serial (RS232) at the same time, in case you want to connect multiple devices.
In this article we assume that you have already connected the Emlid GNSS receiver to your computer or mobile phone, and that you downloaded and installed the "Emlid Flow" app. Alternatively, it is possible to configure the receiver via the built-in web page, but in our examples we use the Emlid app (which closely resembles the web interface).
After starting the App, select the GNSS receiver you wish to configure from the list. When you own a base and rover pair, make sure to select the name or IP address of the rover.
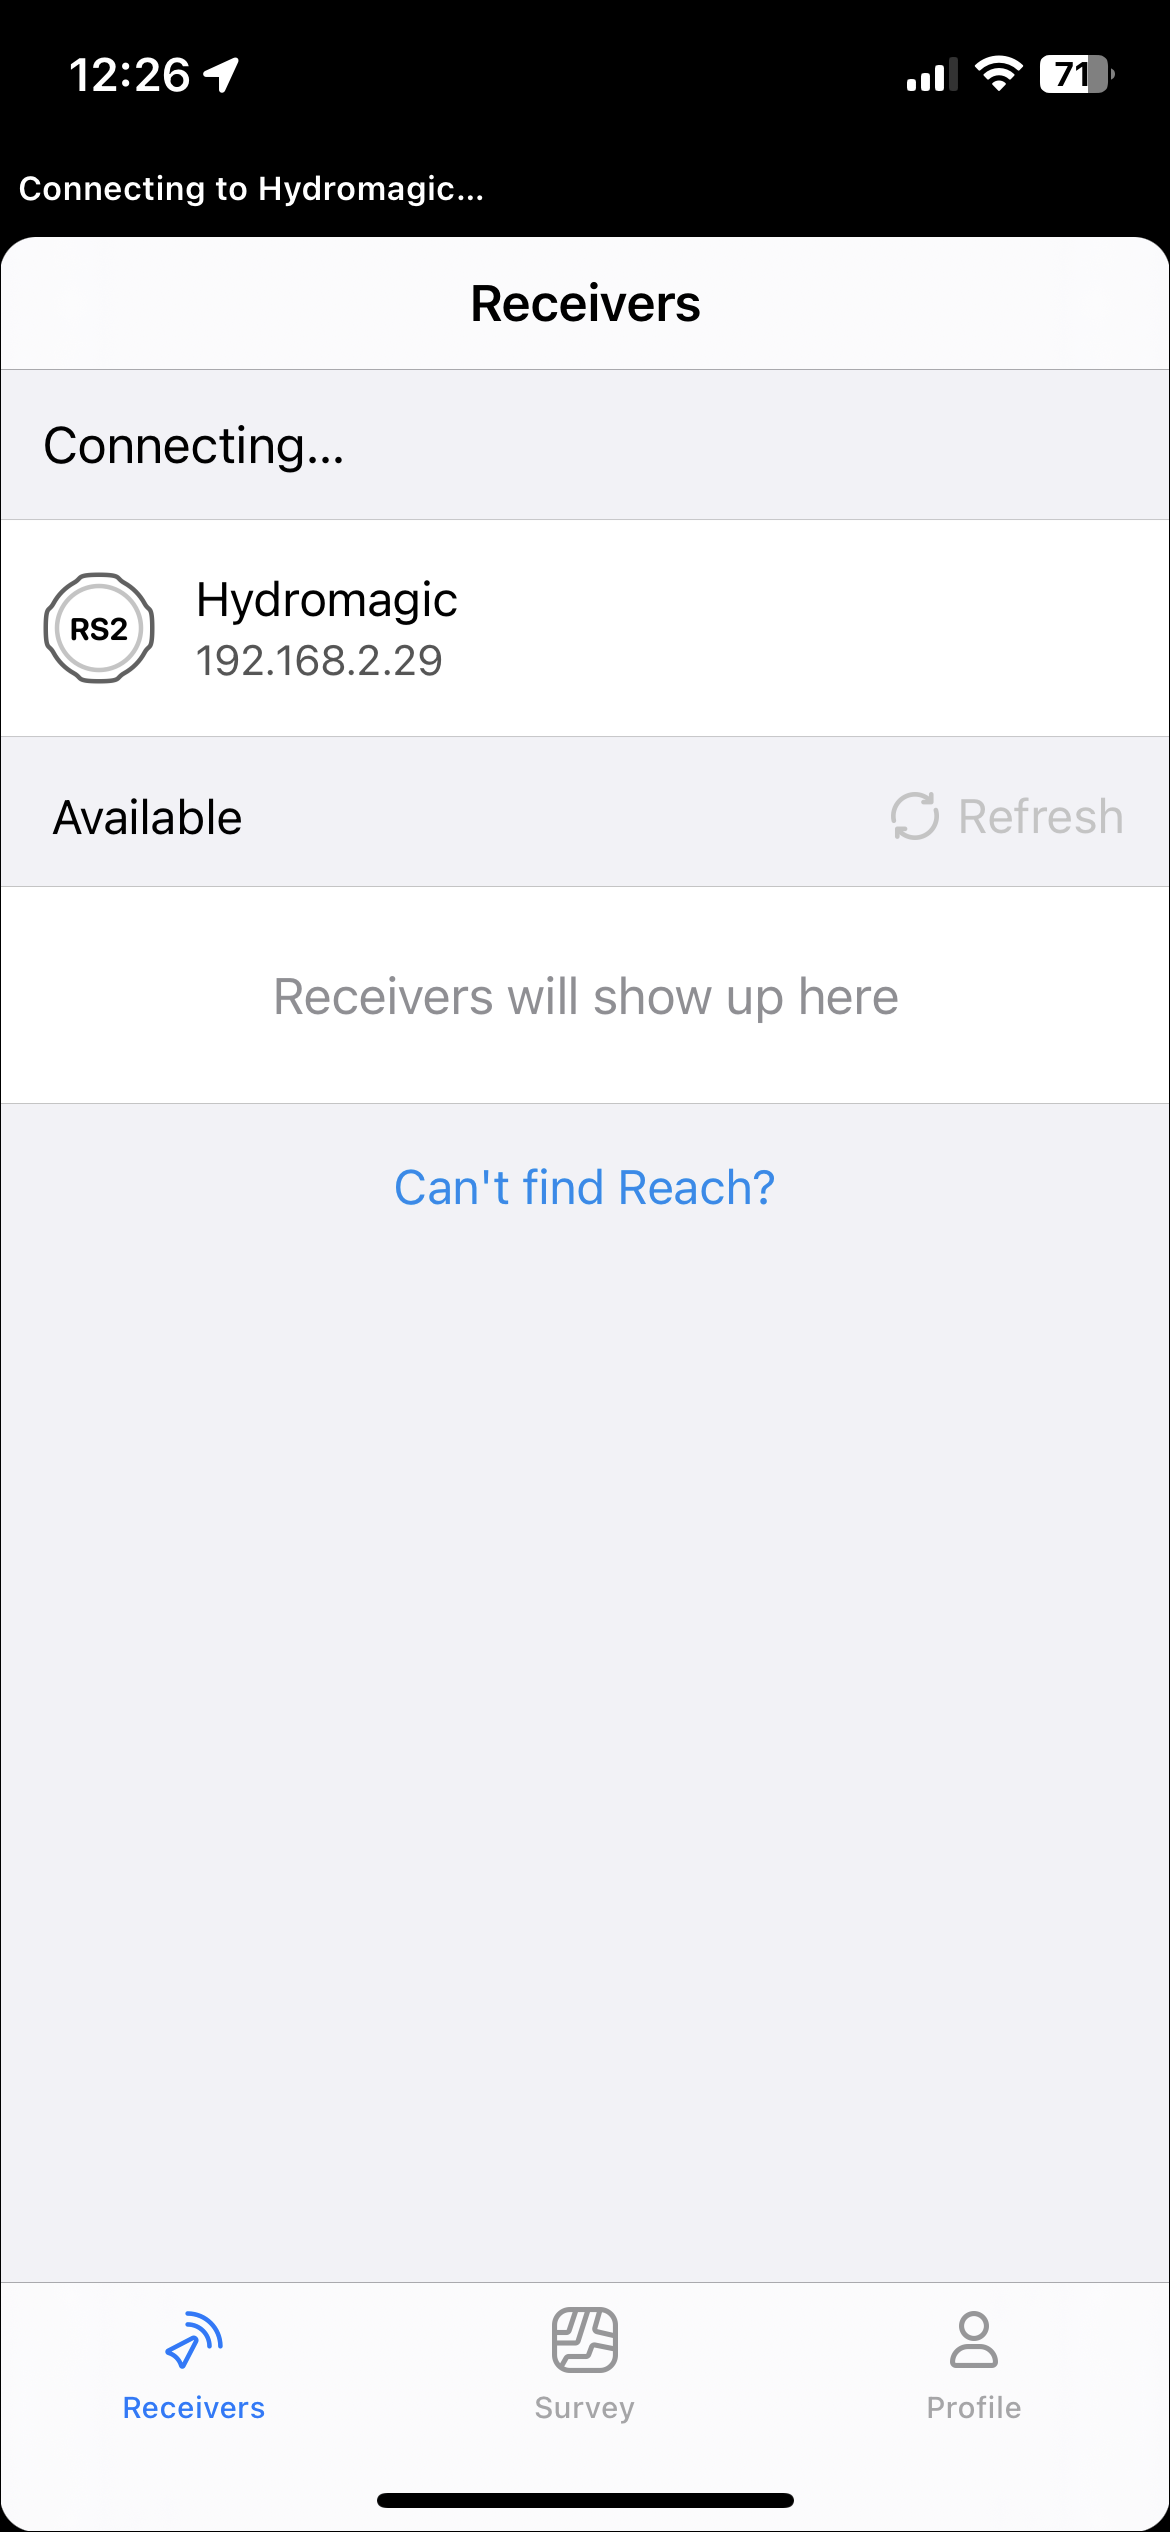
Select your rover from the main screen in the Emlid Flow app.
When the Emlid Flow App has successfully been connected to the rover, the receivers "Main Menu" is displayed in the App. Click the "Settings" option at the bottom of the list, to access the page where the communication settings are.
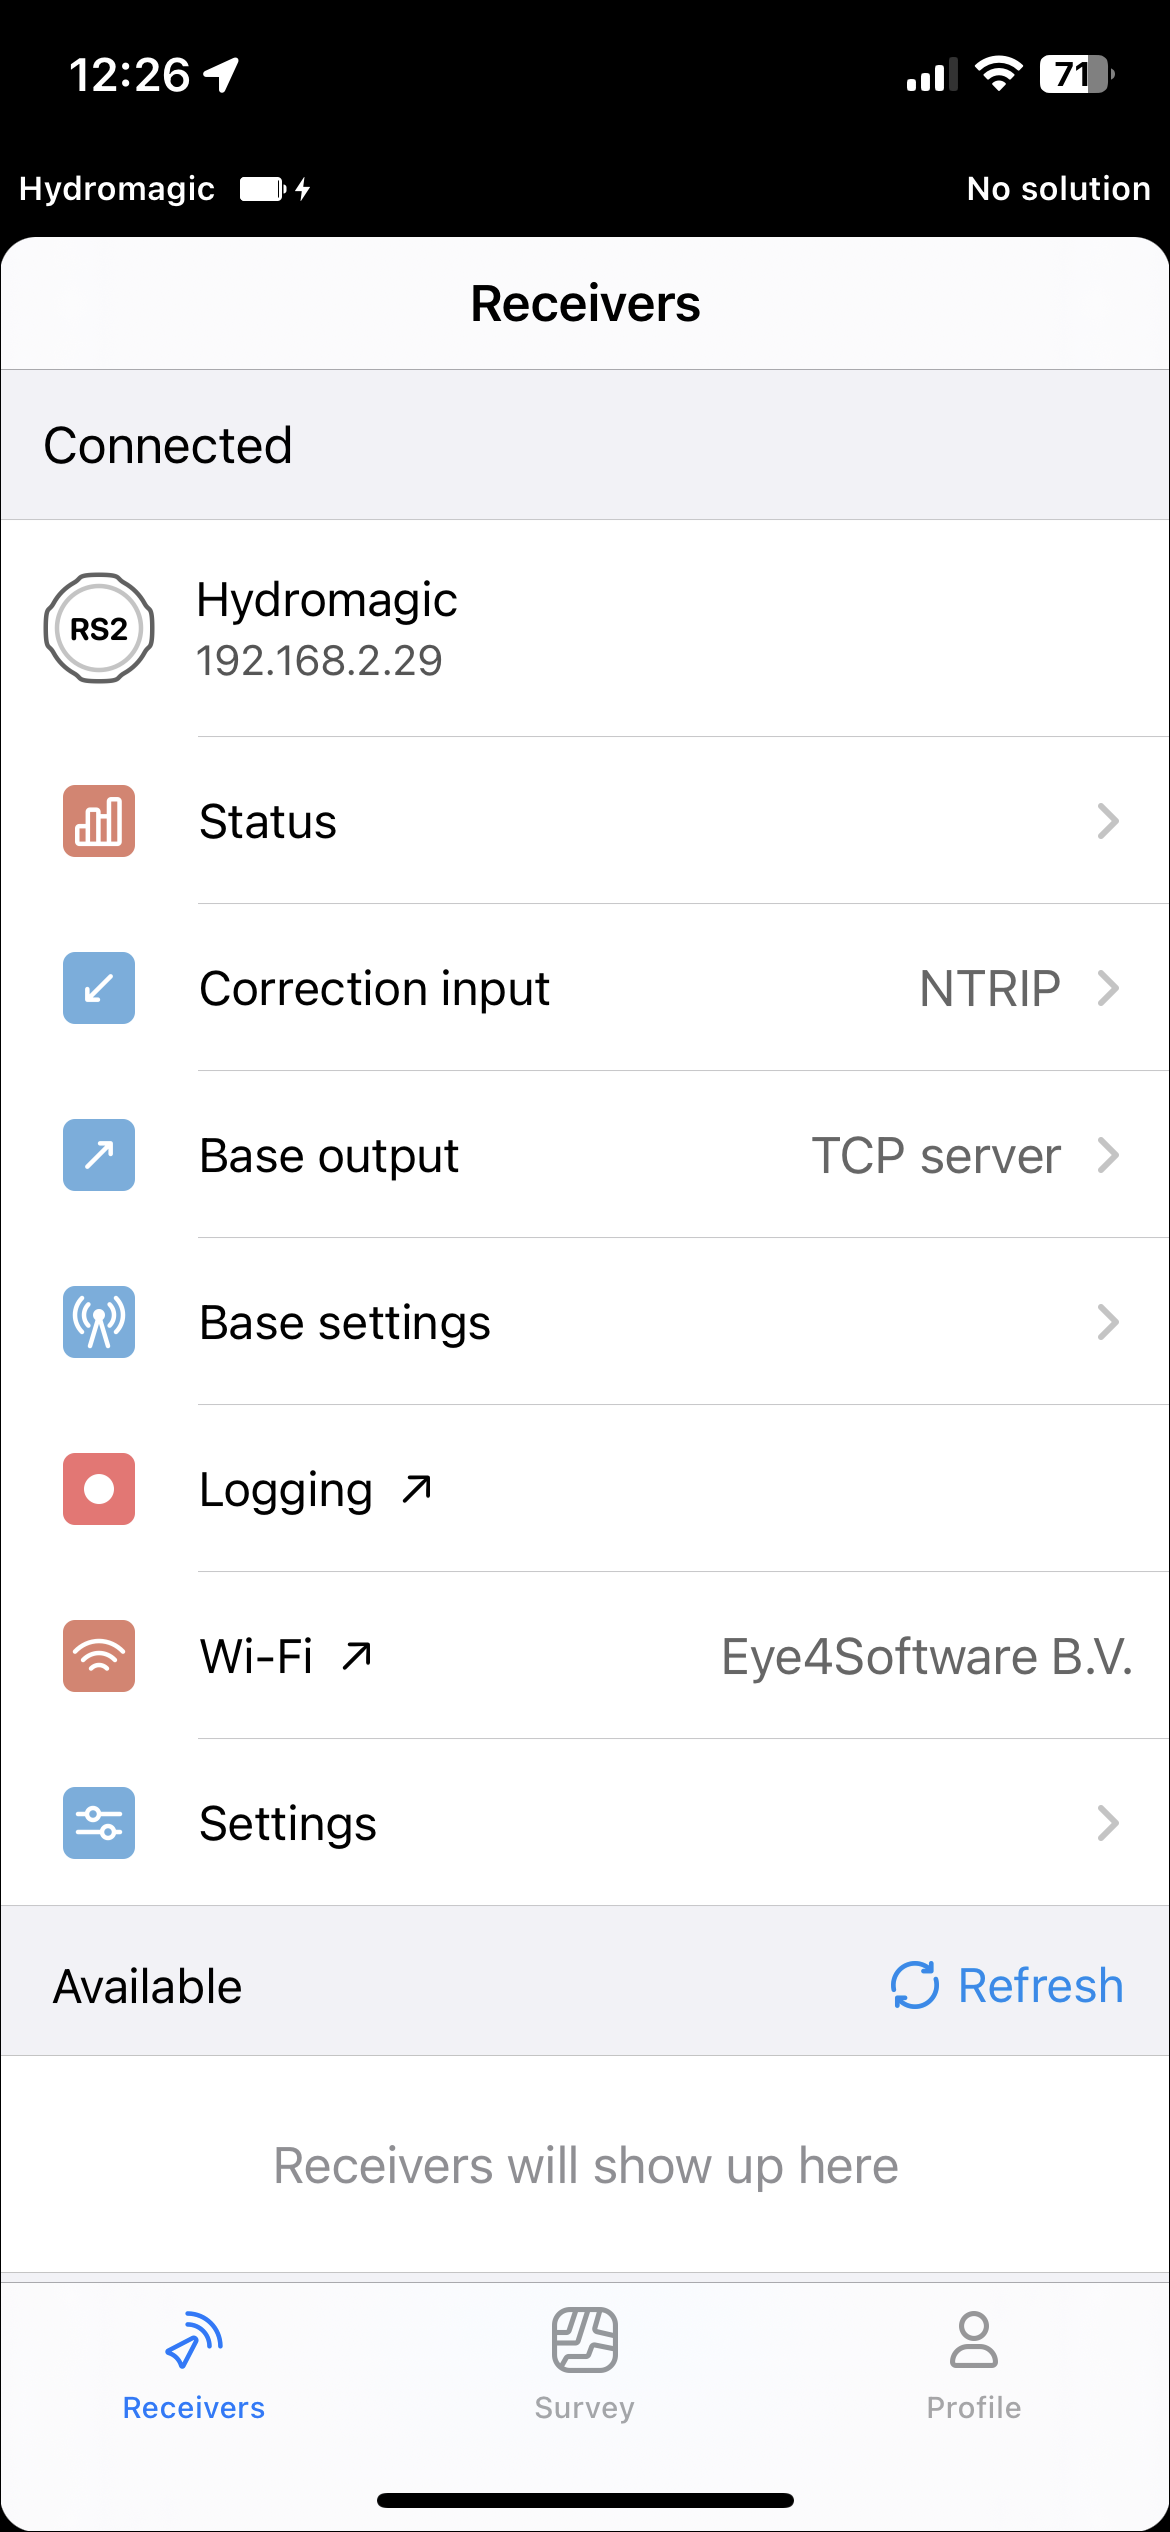
The receivers main menu is displayed after selecting the rover.
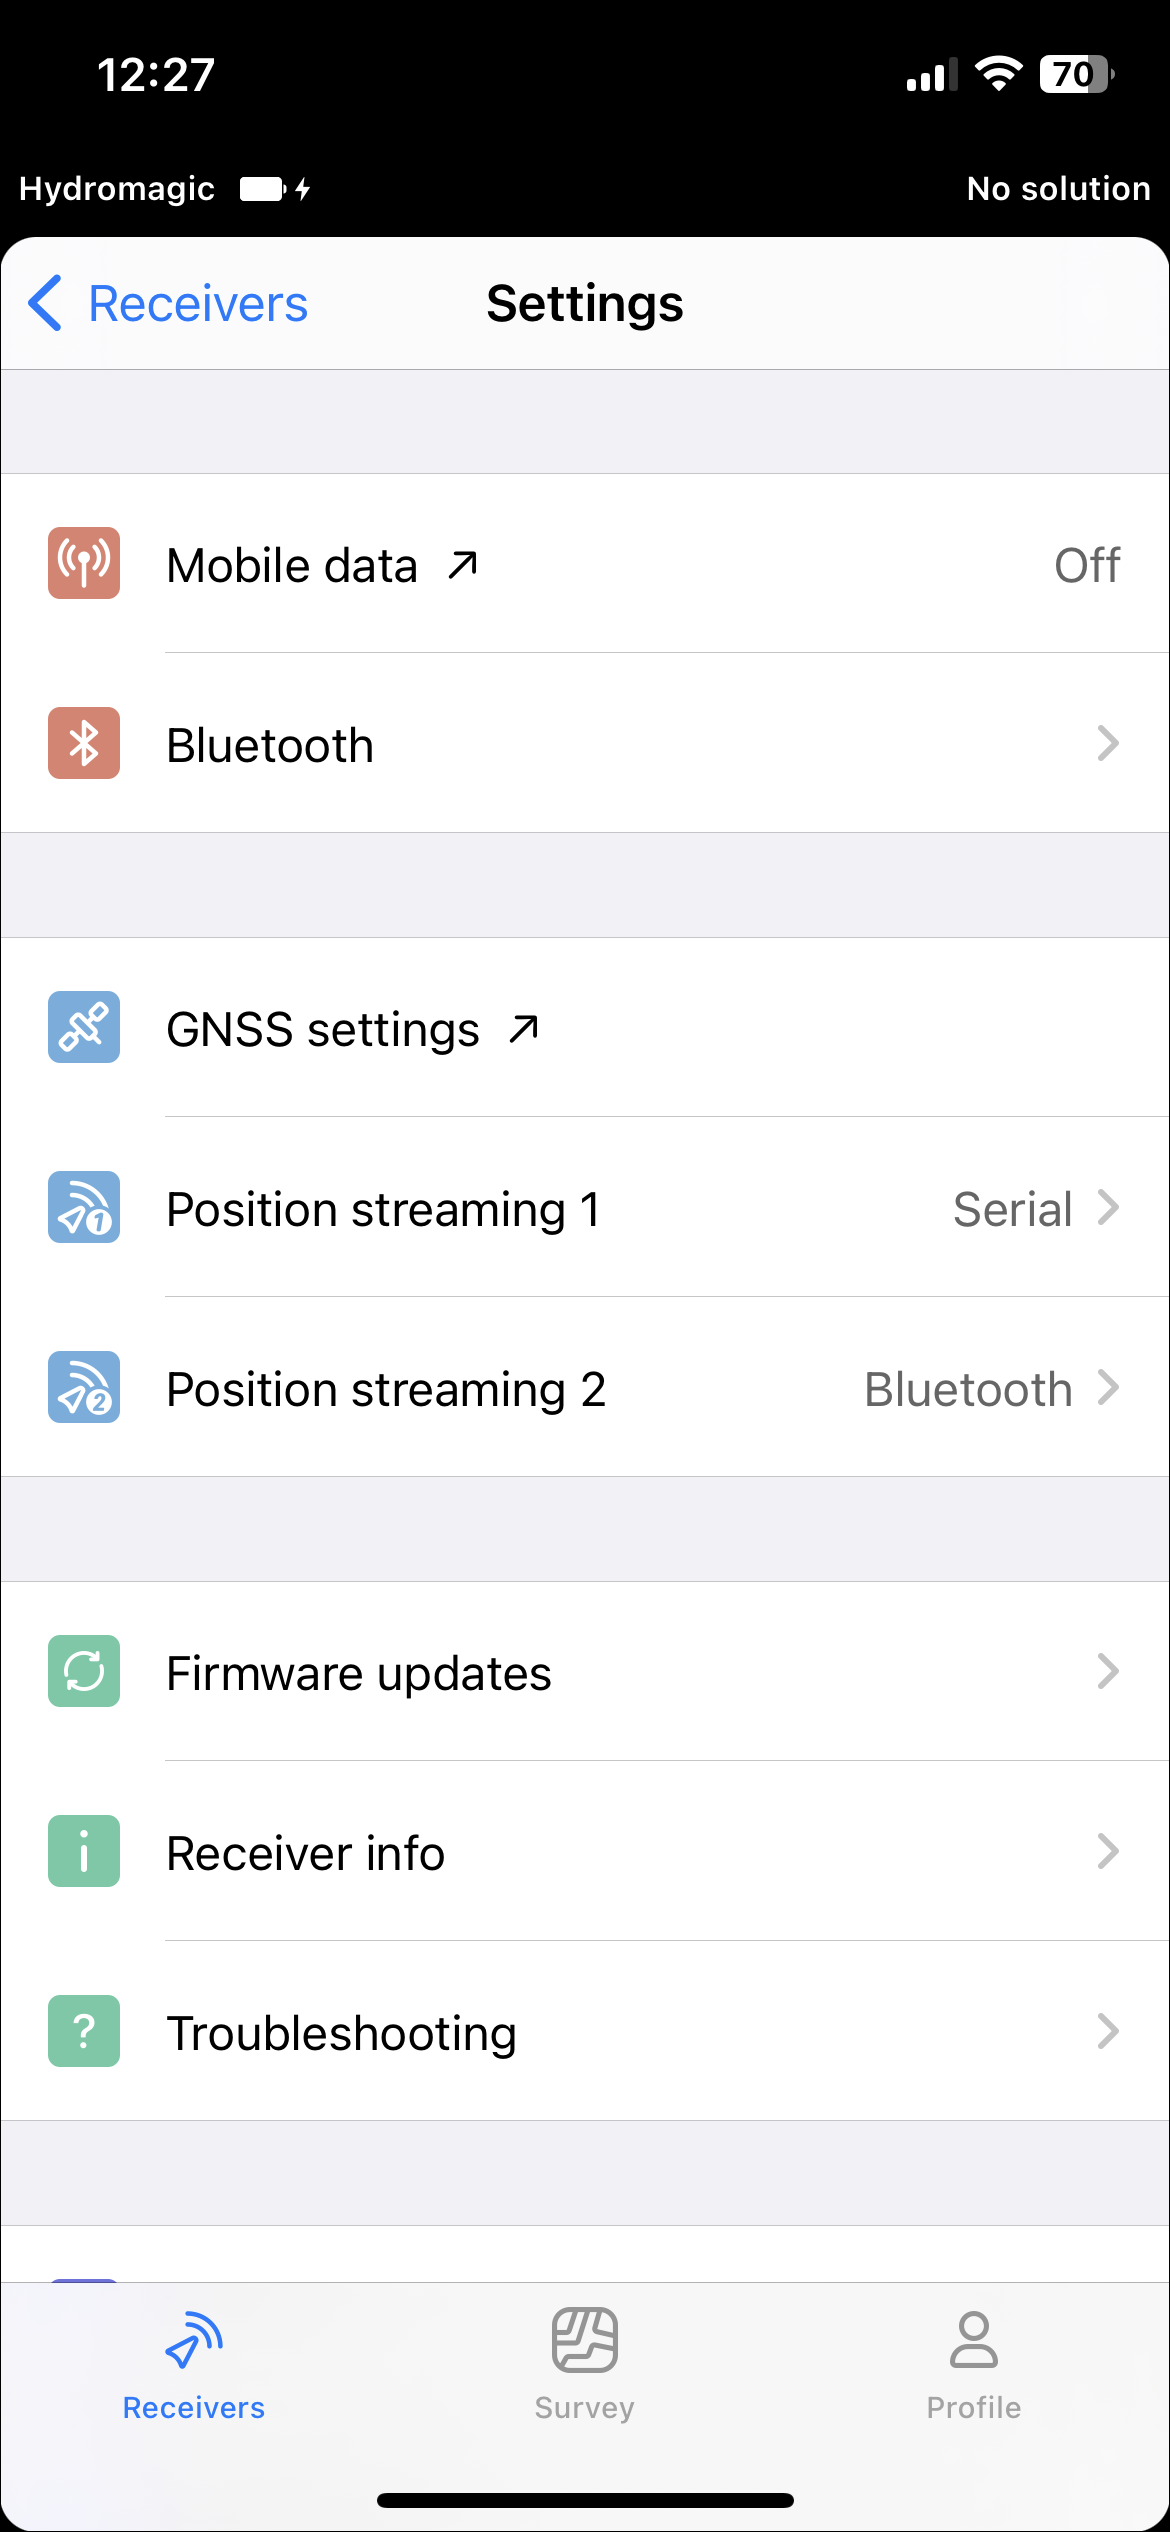
From the Communication settings page, select the "Position Streaming 1" option. Alternatively, you can use the "Position Streaming 2" option when the "Position Streaming 1" option is already configured for other purposes.
Select your rover from the main screen in the Emlid Flow app.
Configure the Reach RS2 for outputting data over the serial data cable
To connect the RS2(+) using a serial cable, you have to order a special cable first.It is not shipped with the receiver by default. The cable plugins into the "EXT" connection at the bottom of the receiver. In the "Position Streaming 1" or "Position Streaming 2" menu, select the "Serial" option and click the "Pencil" icon to configure the baud rate and the data format to use.
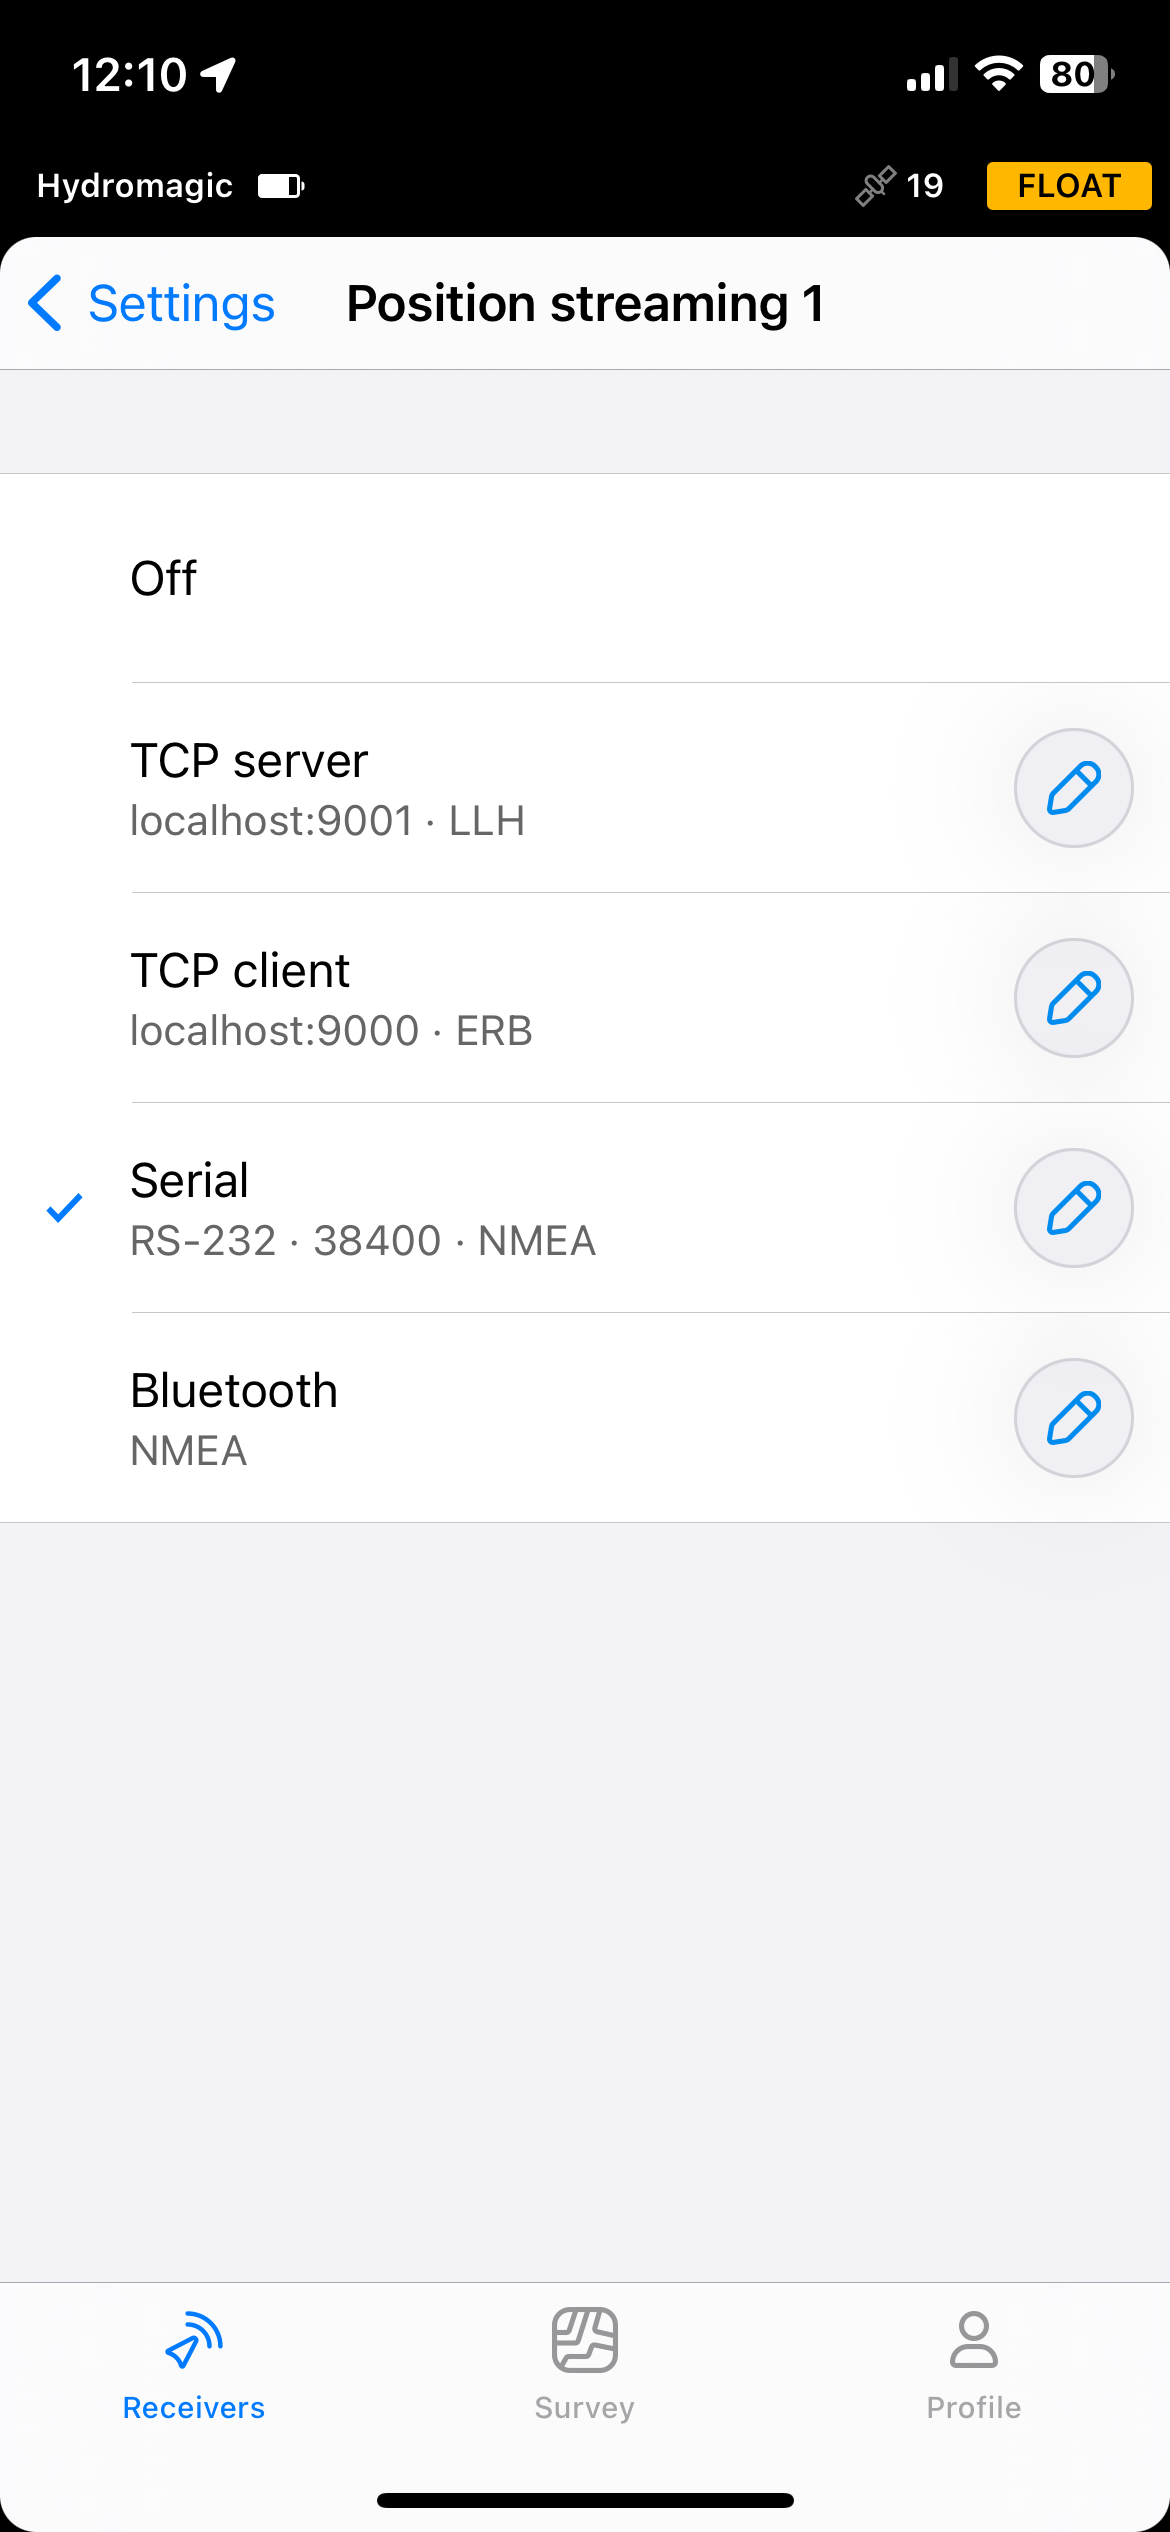
Select serial to connect using the serial cable.
After clicking the "Pencil" icon, select the desired baud rate. The default setting of 38400 bps should suffice in most cases. Also make sure to select the output format to "NMEA". When done, proceed to the "NMEA Settings" by clicking the button at the bottom of the screen. Now proceed to the "Selecting NMEA0183 sentences to transmit" paragraph for more info on which NMEA0183 sentences should be selected. After getting back to this page, please do not forget to click the "Save" button to store your connection settings.
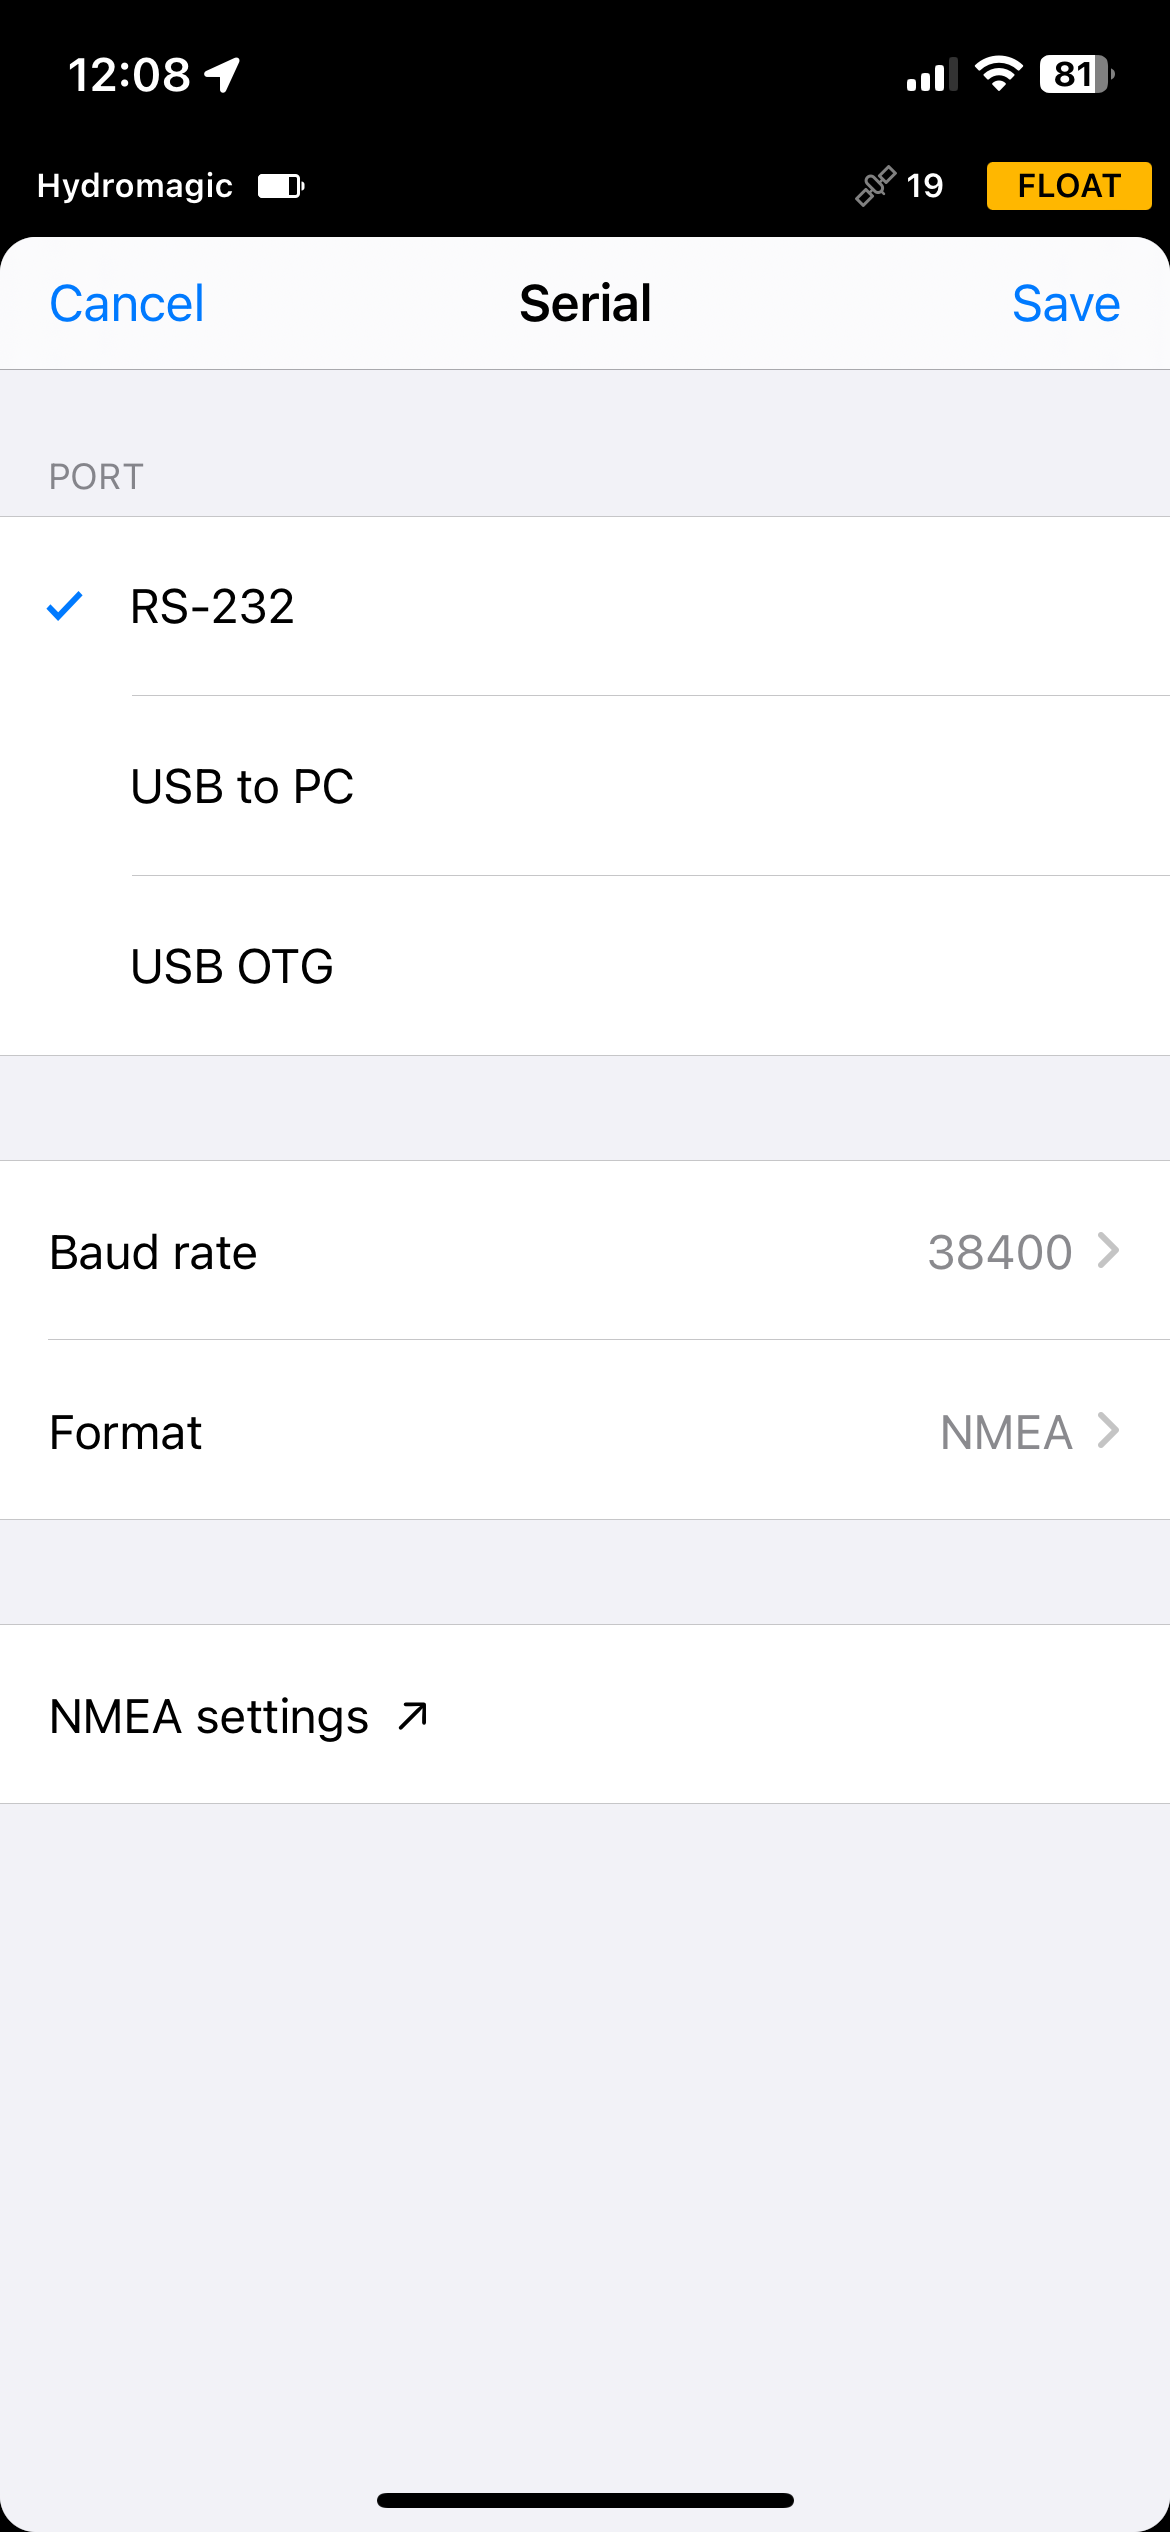
Select the correct baud rate and protocol in the serial settings page.
Configure the Reach RS2 for outputting data over Bluetooth
The Reach RS2(+) has a built in Bluetooth radio which can be used to transfer NMEA0183 data from the receiver to the computer wireless. In order to use Bluetooth, make sure that the receiver has been paired with and connected with your computer. For more information on how to pair and connect your device, please refer to either the "Pairing and configuring Bluetooth hardware (Windows 7)" or "Pairing and configuring Bluetooth hardware (Windows 10)" page of the Hydromagic user manual.
To select Bluetooth, in the "Position Streaming 1" or "Position Streaming 2" menu, select the "Bluetooth" option and click the "Pencil" icon to configure the data format to use.
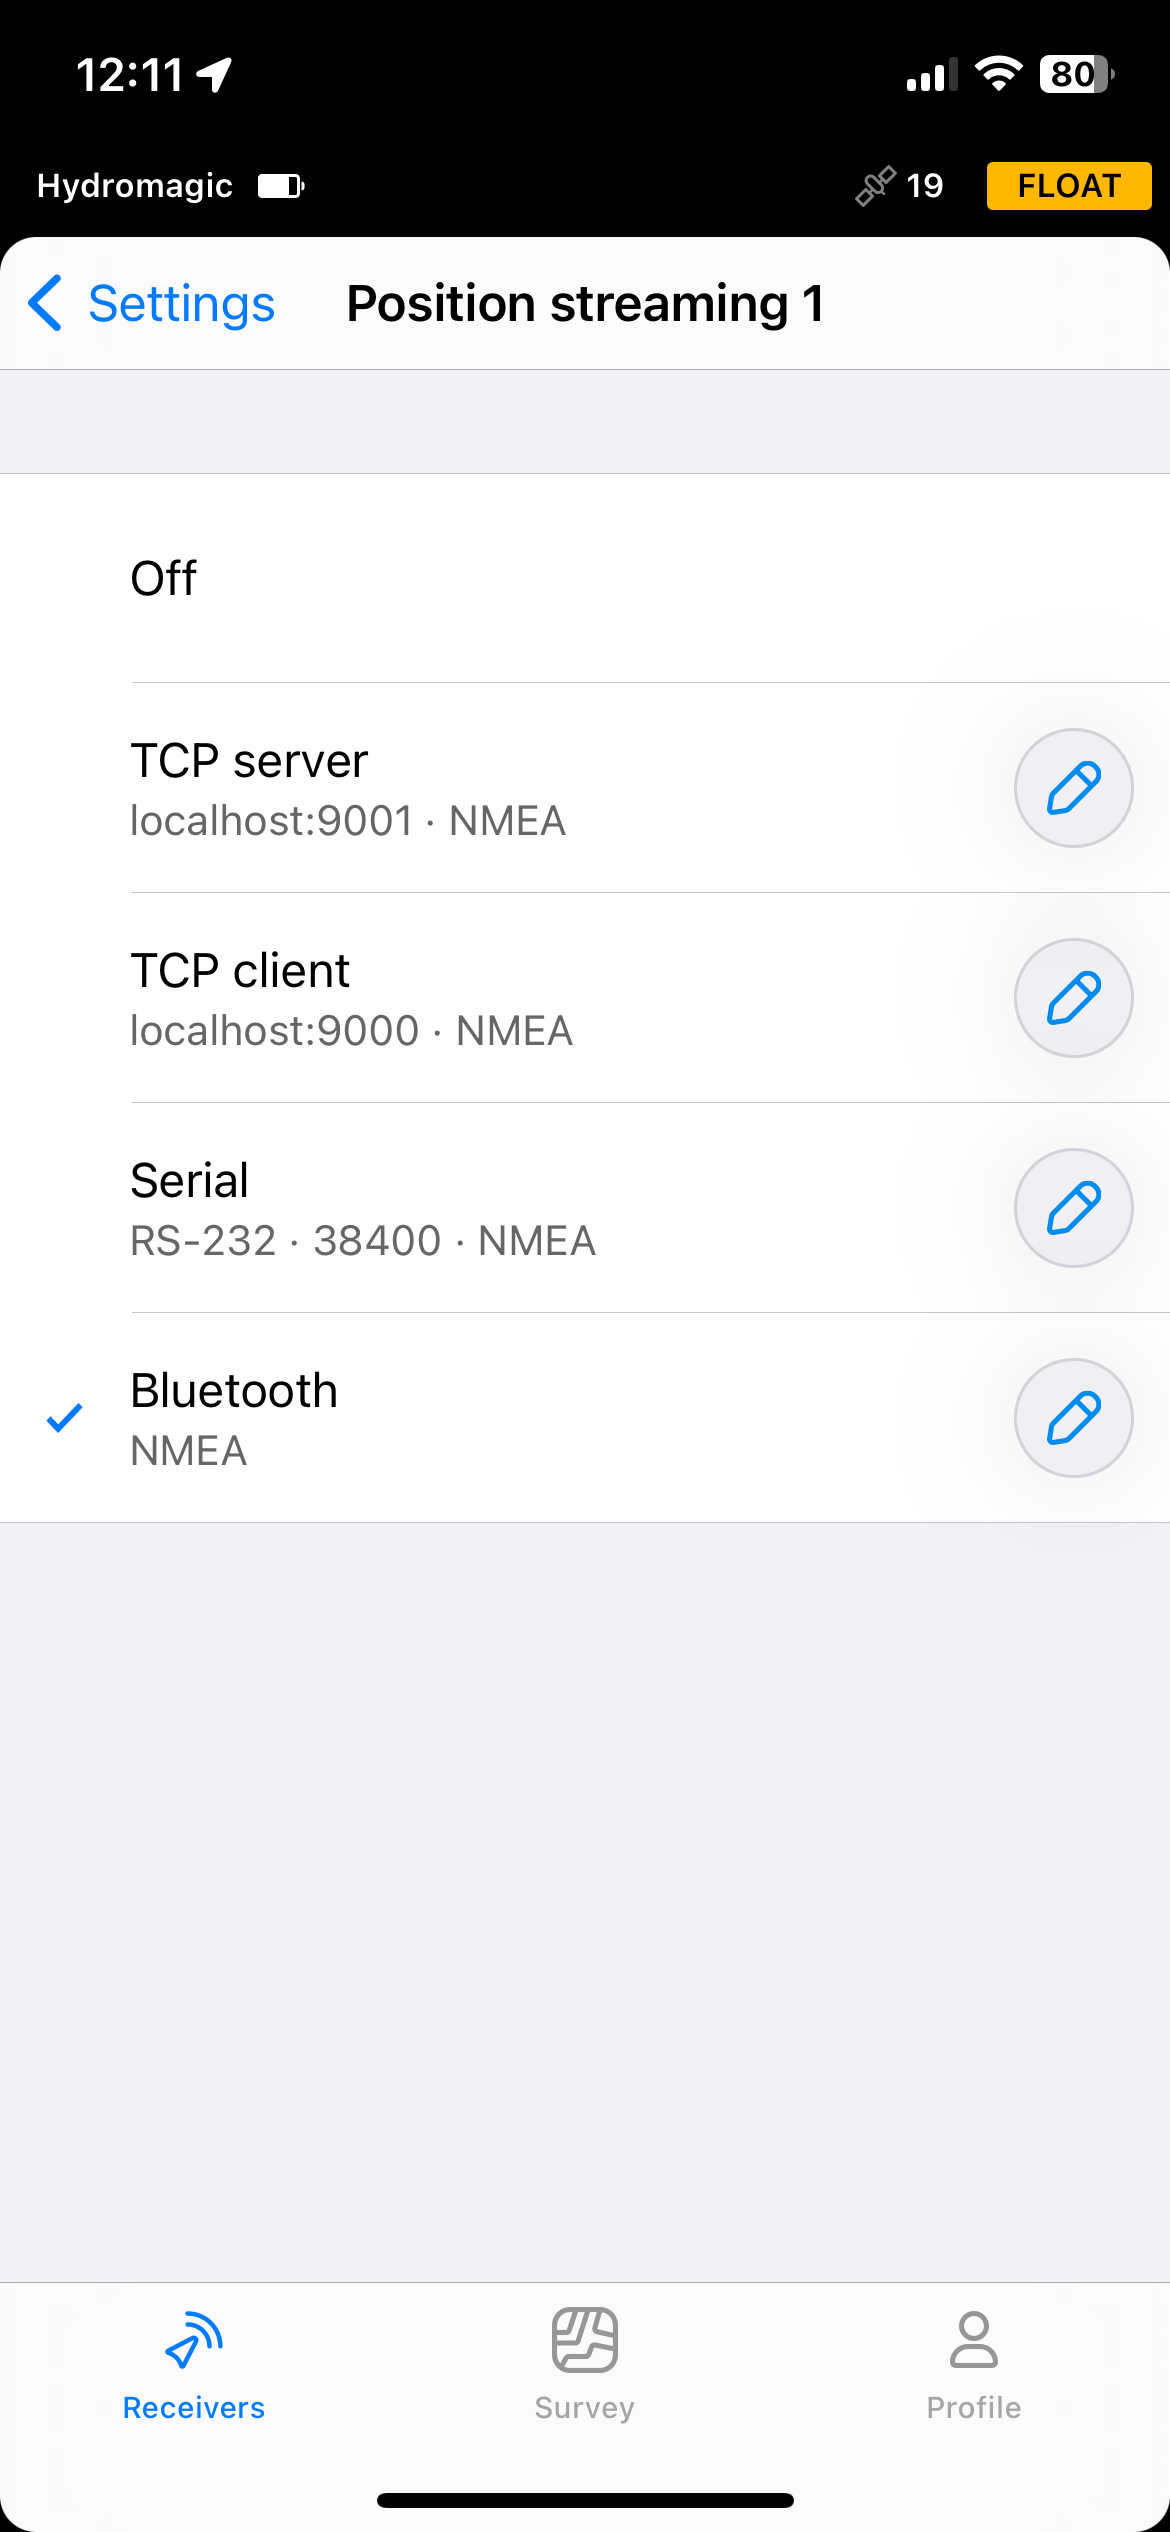
Select Bluetooth to connect using a wireless Bluetooth connection.
After clicking the "Pencil" icon, change output format to "NMEA". When done, proceed to the "NMEA Settings" by clicking the button at the bottom of the screen. Now proceed to the "Selecting NMEA0183 sentences to transmit" paragraph for more info on which NMEA0183 sentences should be selected. After getting back to this page, please do not forget to click the "Save" button to store your connection settings.
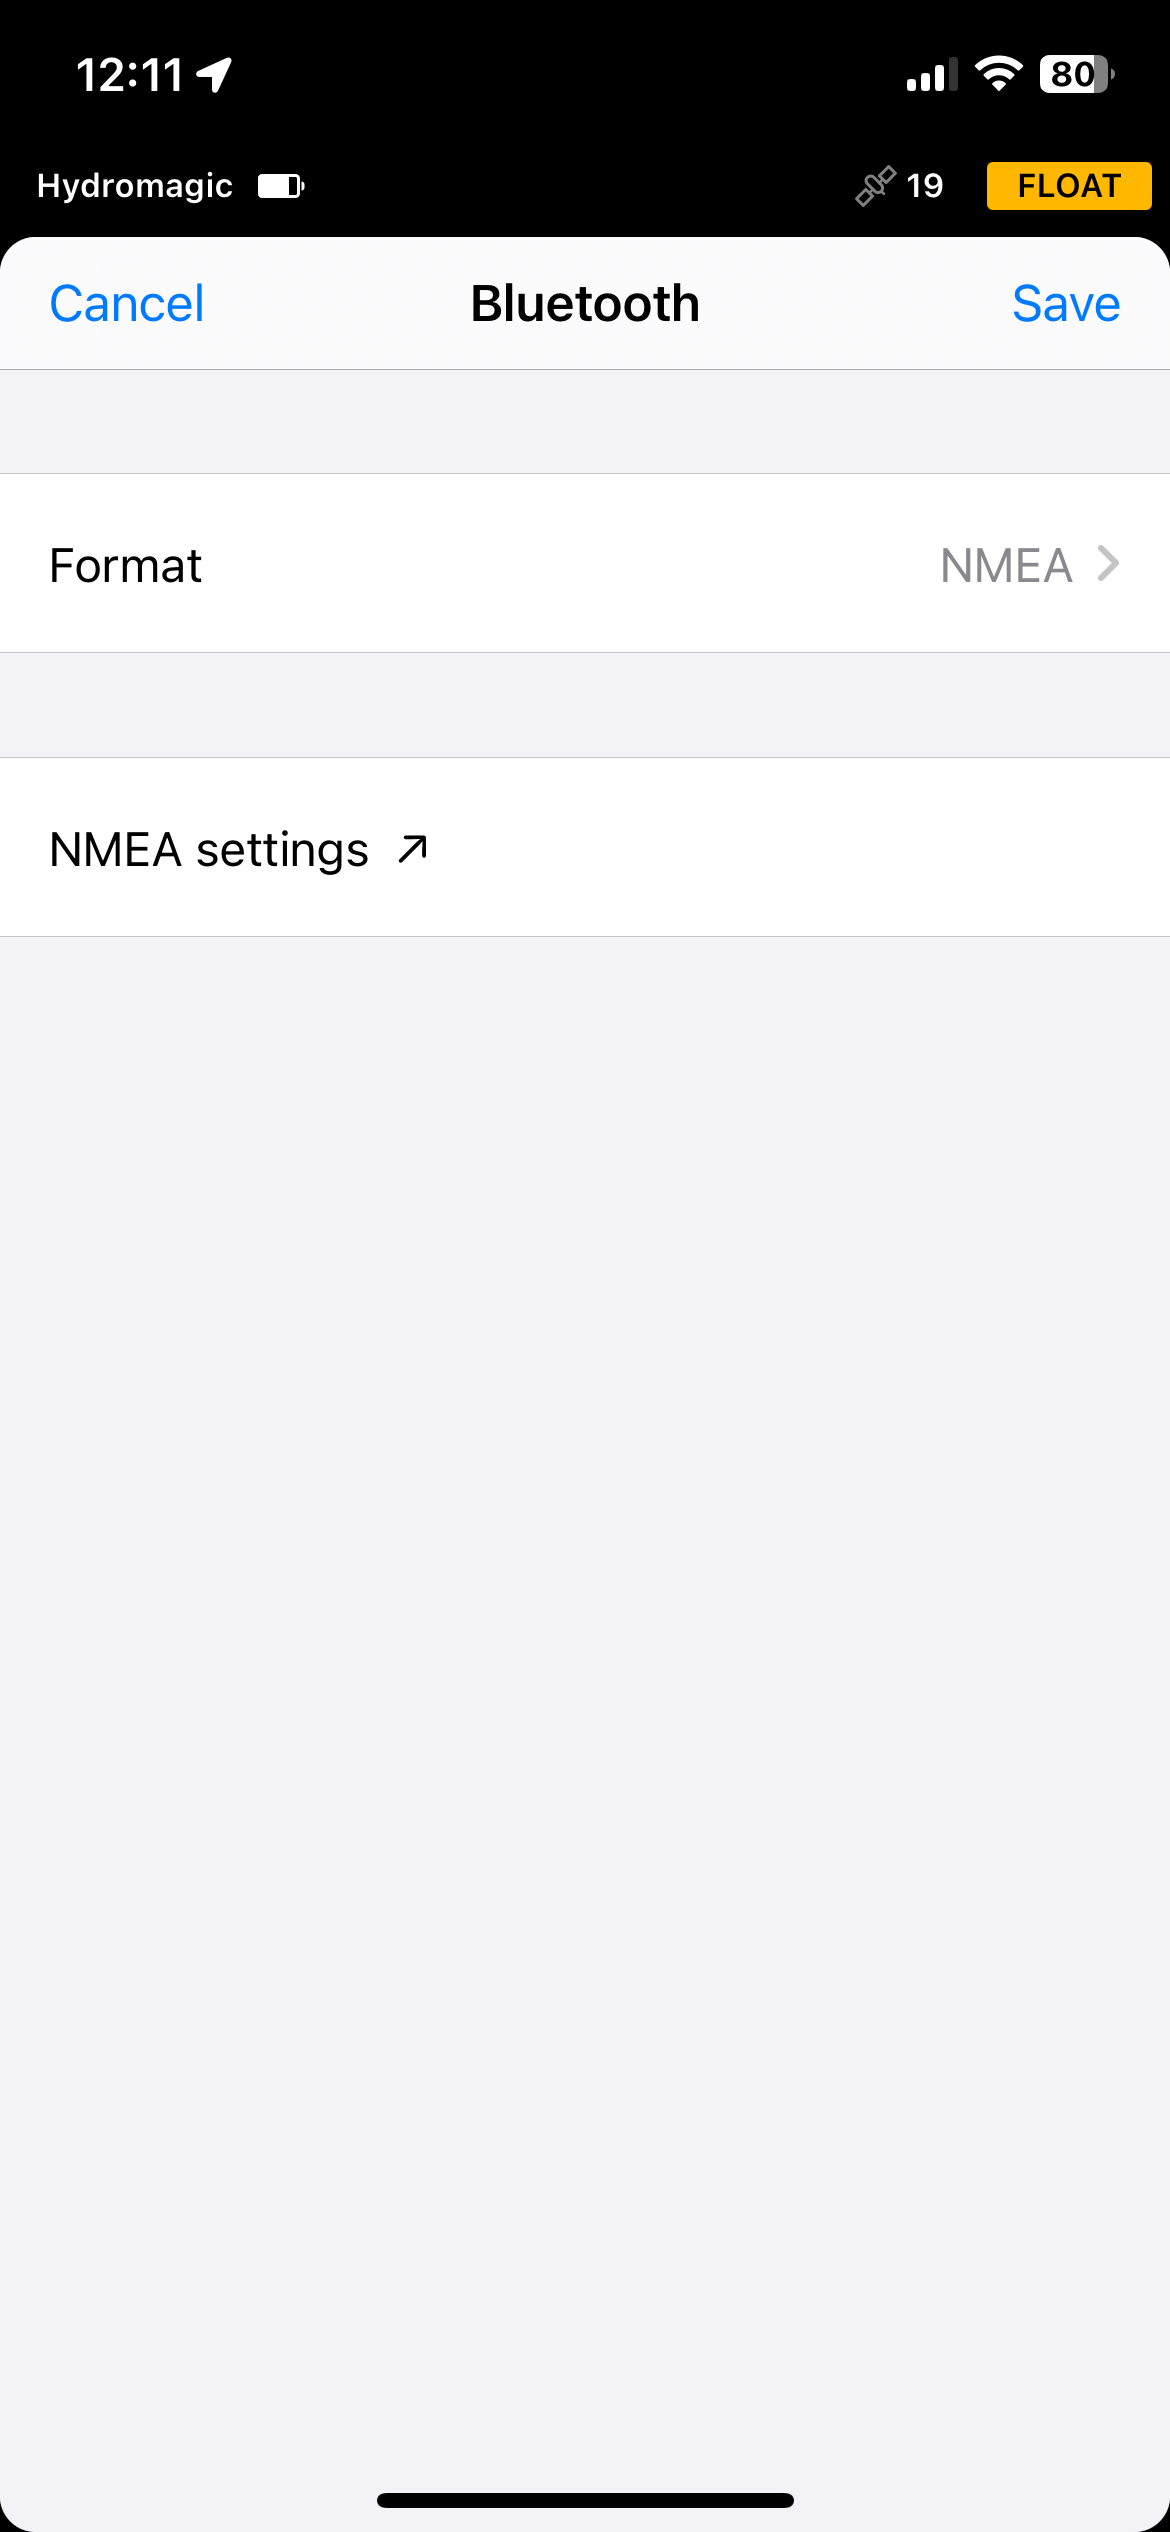
Select the correct protocol in the Bluetooth settings page.
Selecting NMEA0183 sentences to transmit
After selecting either the "TCP Server", "TCP Client", "Serial" or "Bluetooth" option, you also have to select the output format (NMEA0183) and the NMEA0183 sentences to broadcast over the connection. Hydromagic is using the GGA, GST and VTG sentences for position, elevation, course, speed and position precision. Other sentences are not required, and selecting them will only cause redundant information to be saved in your raw data files.
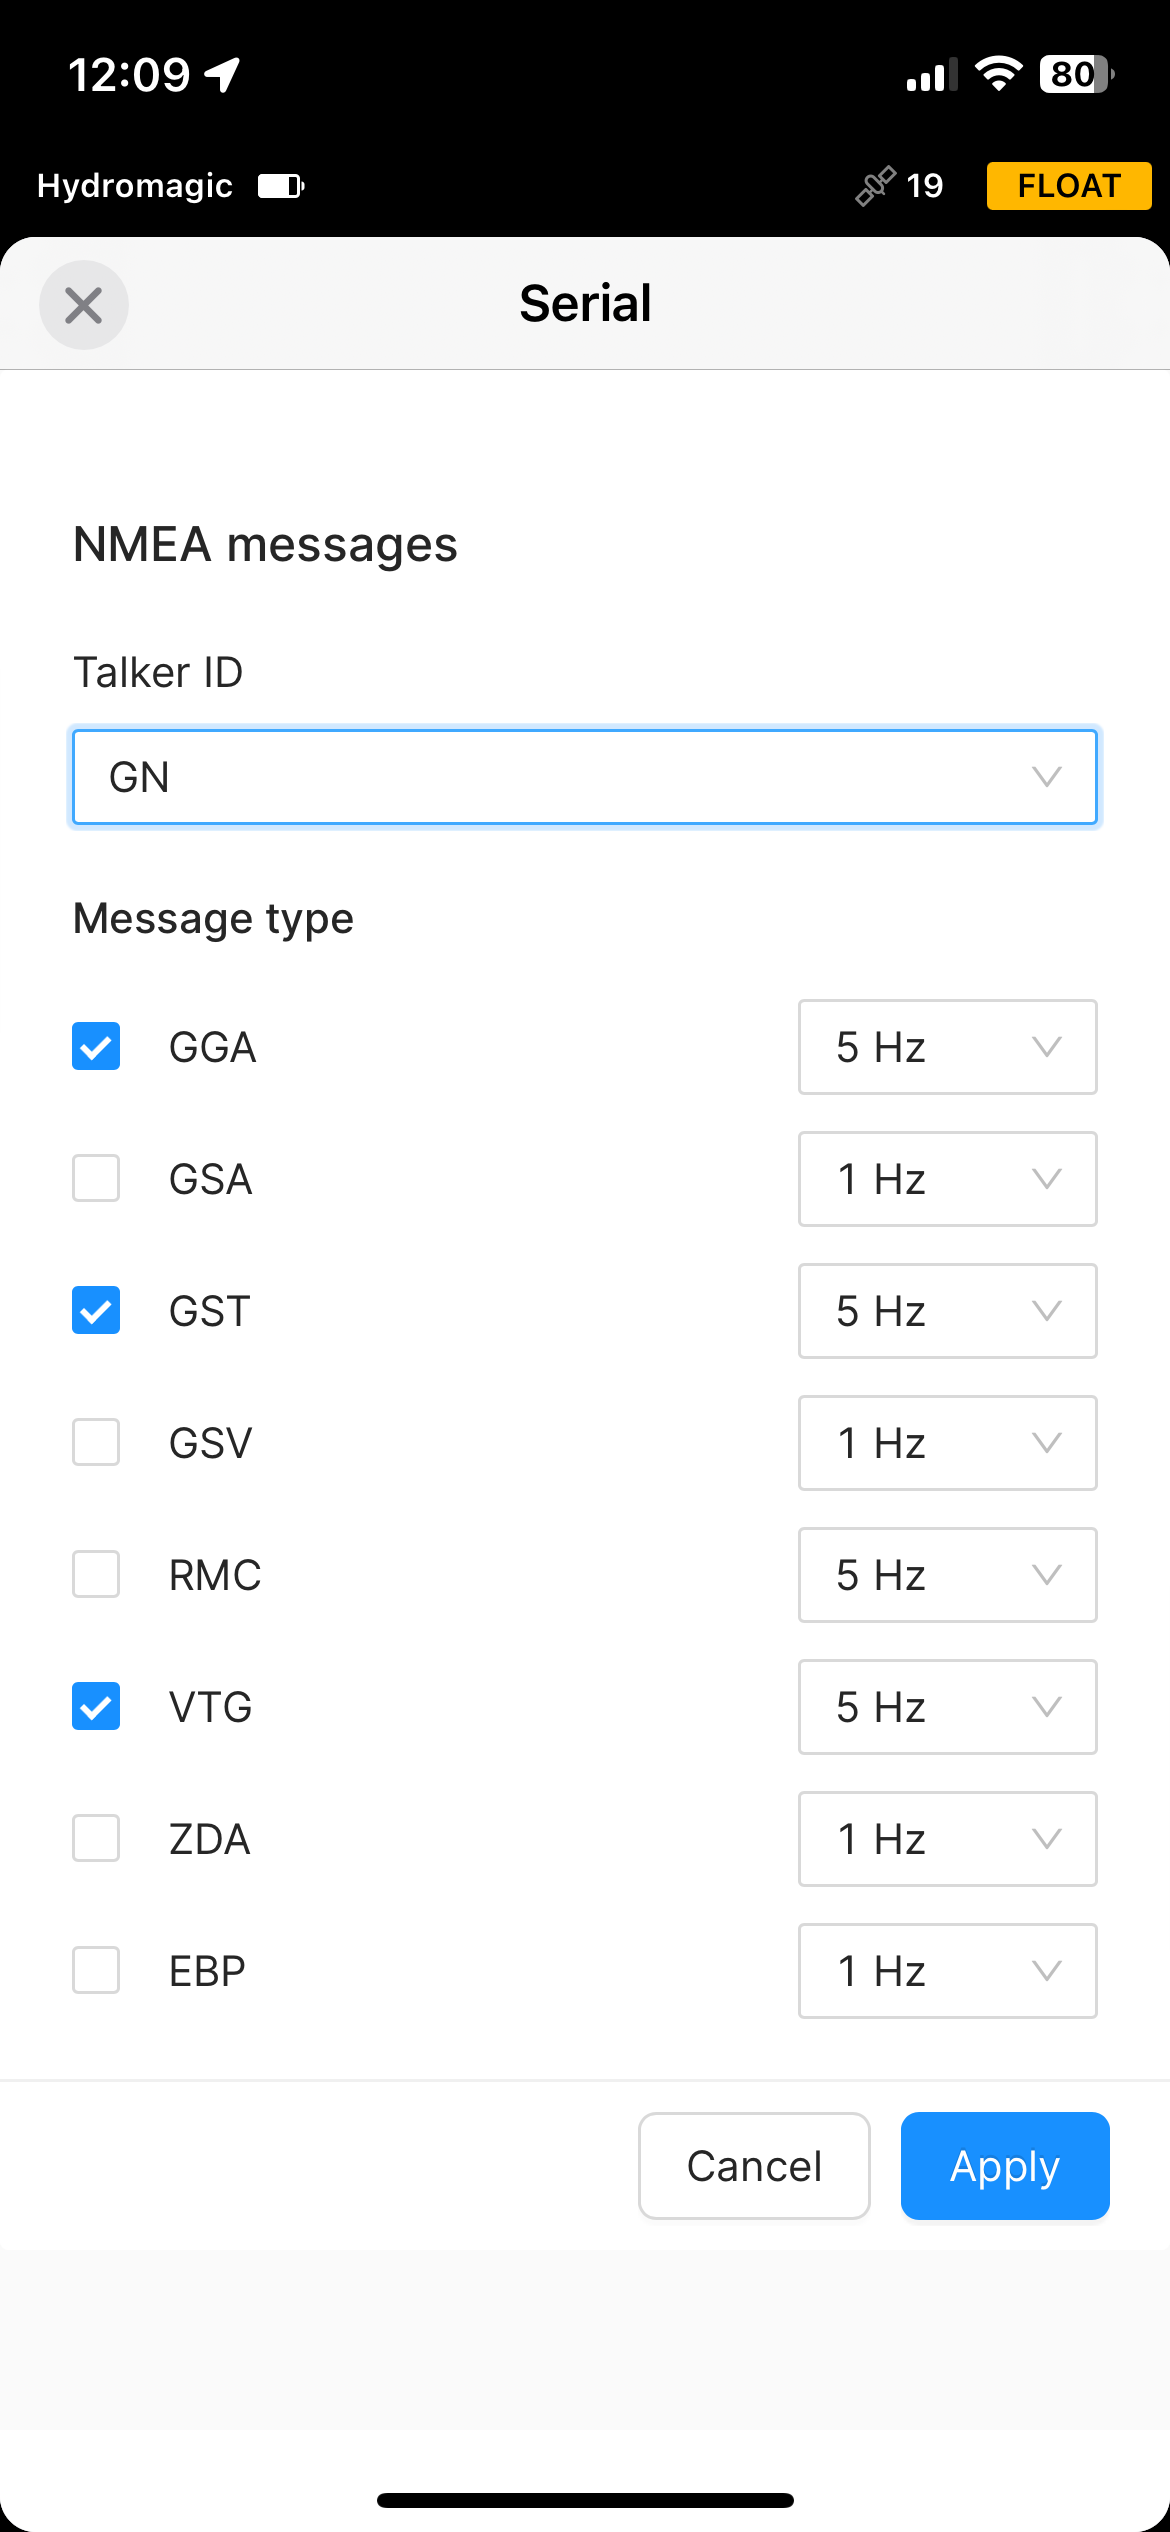
Select the correct NMEA0183 settings for Hydromagic.
Loading the NMEA0183 Plugin
To add a NMEA0183 compatible device to the configuration, select "Preferences..." from the "Options" menu and select the "Devices" tab:
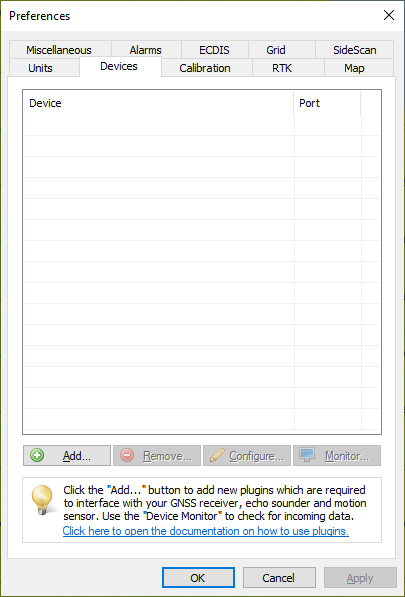
Select the "Devices" tab from the "Preferences" window.
In the devices tab, click the "Add..." button to load a NMEA0183 plugin. You can load a maximum of four (4) NMEA0183 plugins simultaneously. Next, select the first available "NMEA0183 plugin" in the "Select Device" dialog which appears after clicking the "Add..." button and click "OK" to show the plugin's configuration options.
Communication settings
After the plugin has been loaded, a configuration dialog will be displayed where you can pass the required information before loading the plugin. This information has to be entered only once, and will be stored into the main Hydromagic configuration file.


Connection type
The NMEA0183 plugin supports two types of connection types: serial and TCP/IP (networked). When a device is connected through an USB, Bluetooth or serial connection, you have to select the "Serial" option. In cases where the device is connected using an Ethernet cable or WiFi connection, you have to select the "TCP/IP" option from the "Connection Type" drop down box. When switching between the "Serial" and "TCP/IP" connection type, the function of the edit and selection boxes in the "Connection" section will change as shown in the screen shots above.
Serial communication settings
Serial port
Use this drop down box to select the COMxx number of the serial port the device is connected to. This can be either a regular serial port, or a virtual serial port, which is used by USB-to-serial and Bluetooth adapters.
Serial speed
The default serial baud rate for NMEA0183 devices is 4800 bps. However, some hardware is using other speeds (for instance, an AIS receiver will use 38400 bps). When configuring an echo sounder, the serial speed can sometimes deviate from the standard. 4800, 9600, 19200 and 38400 bps are mostly used on these devices.
Serial format
You can leave this setting at it's default value. Devices that use NMEA0183 protocol with other settings are very rare.
Network communication settings
Socket type
Use the "Socket Type" drop-down box to select the TCP/IP protocol used. Possible values are "TCP" and "UDP". Please refer to the hardware vendor on which option is supported. Most devices support both protocols.
Host IP
The IP address of the device. This value is required only for TCP connections. For UDP connections, just provide a valid port number.
Host IP port
Enter the IP (TCP or UDP) port number the device is listening on here. For most wireless NMEA0183 devices, the port 10110 is used, which is the reserved port for NMEA0183.
Miscellaneous settings
Latency
Latency (sometimes called lag) is the time between a measurement has been made (for instance a position fix, or depth) and when the serial data is received by the application. If this value is known for a certain device, you can enter it here to get more accurate soundings, since the timestamps will be corrected when processing the raw data files.
NMEA0183 protocol settings
Talker ID
Use this option to filter NMEA0183 sentences by talker ID. It sometimes happens that both the echo sounder and GNSS receiver are transmitting GNSS sentences, in this case you can either select the GNSS or echo sounder by specifying "GP", "GN" or "SD" in this field.
Sentences
To select which NMEA0183 sentences will be decoded, and which ones will be ignored on this channel, click the "Select sentences..." button. The dialog that appears allows you to select which sentences are used. For most echo sounders devices, it is safe to select all sentences, since most of the times only one sentence is used.
When the depth values starts flipping between two values, most probably the echo sounder is sending both DBS and DBT sentences. In this case, use either DBS with echo sounder draft set to zero, or set the draft and select the DBT sentence only.
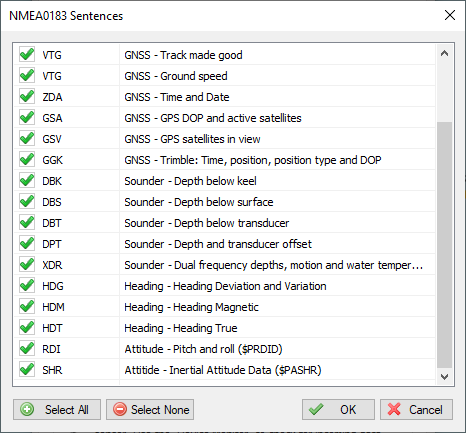
Select which NMEA0183 sentences are handled and which ones are ignored.
Supported NMEA0183 sentences for echo sounders
| Sentence | Description |
|---|---|
| $SDDBK | Depth below keel |
| $SDDBS | Depth below surface |
| $SDDBT | Depth below transducer |
| $SDDPT | Depth and keel offset |
| $SDXDR | Dual frequency depth (below transducer) |
Testing the echo sounder configuration
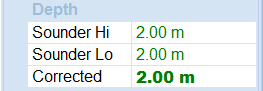
When everything has been configured correctly, and the sounder has been switched on, depth field in the "Data View" should display a depth value in green. Please note that some echo sounder output a valid depth value only when the transducer is in the water.
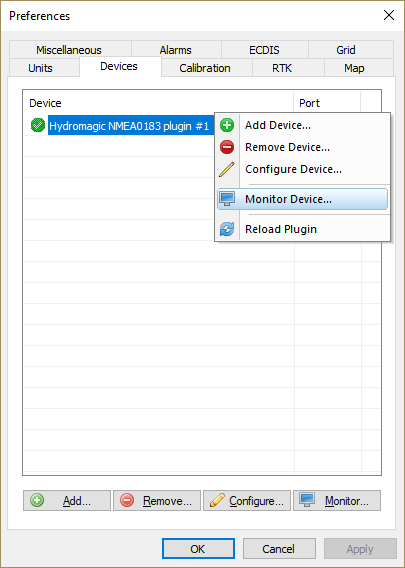
Troubleshooting the NMEA0183 plugin
When no data is displayed, you can check whether data is coming in by using the "Communications Monitor": Open the preferences window by selecting "Preferences..." from the "Options" menu. In the window that appears, select the "Devices" tab. Next select the "Hydromagic NMEA0183 plugin" and click the "Monitor..." button. The communication monitor appears. When the monitor displays garbled data or no data at all, the serial port or serial speed setting might be incorrect.
When you encounter problems getting the serial port to receive data, we suggest you to have a look at our YouTube tutorial on troubleshooting serial communications using the puTTY software (free software).
Start the "Communications Monitor" to monitor incoming NMEA0183 data.