
Start recording data
Before you can start recording raw data files, it is recommended to perform the following checklist:
- You have opened an existing or created a new project;
- Make sure the position is valid, and the GPS/RTK receiver has good reception;
- When using an RTK receiver, make sure the receiver is in the 'RTK FIXED' state;
- Check whether a depth is indicated in the "Data View";
- Check the echosounder offset (also known as static or fixed draft);
- When using a motion sensor, make sure it is calibrated;
- When using real-time RTK tide information, make sure the antenna offset and correct geoid model are selected;
- Check the PC's time and date; this is important when using manual tide correction.
- It is recommended to enable the "autosave" function, please see below for more information.
The next step is to open or download a background map, although it is not required, it can be used to check whether your GNSS position is still correct and the software is still writing new records to the raw data file.
Recording raw data
A sounding is created in two steps. First, you are going to record raw data. All position, motion, and depth data are time-stamped and stored in an ASCII file. The second step is to correct the raw data and generate soundings from it.
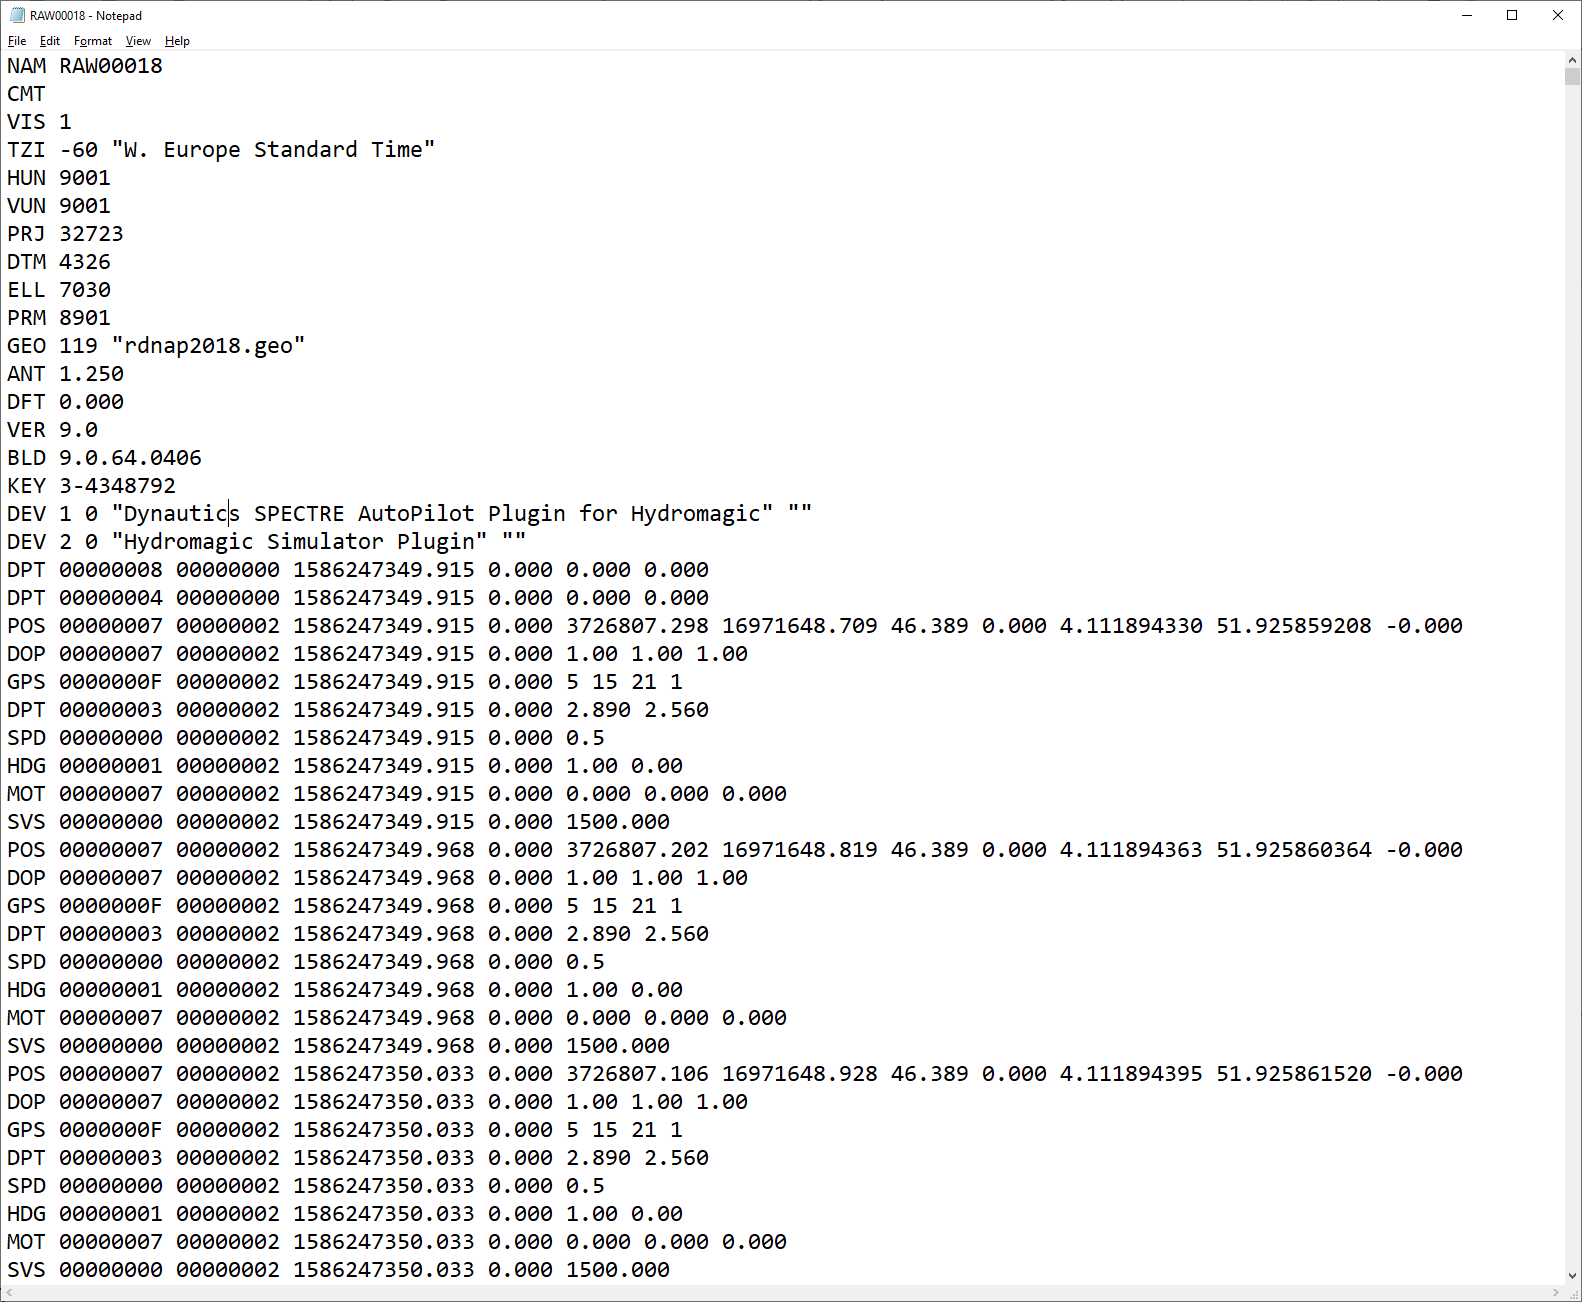
Example of a Hydromagic raw data file opened in Notepad.
Recording raw data files
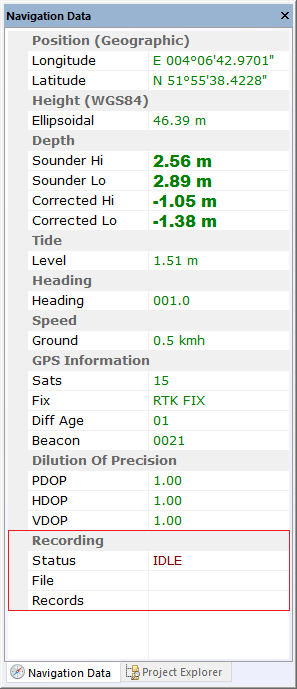
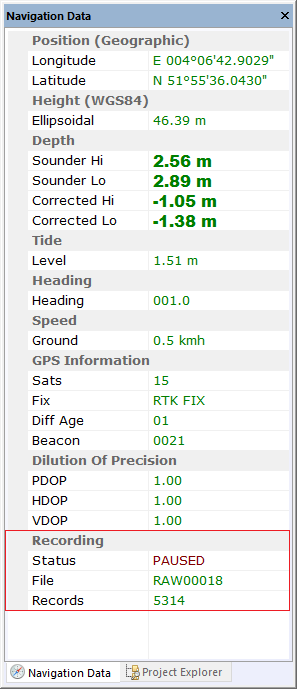
When you are ready to start your survey, just click the "Record" button ( ) to start recording all sensor data to a newly created raw data file. Raw data files are generated every time you start a new recording. Raw files are named RAW0001, RAW0002, RAW0003 etc. You can record the complete area to a single file, or start a new data file for each surveyed line (we recommend the latter). To check the recording status, check the recording indicator right on the status bar, or check the "Recording" section in the "Data View" display as shown by the screen shots below.
To pause a recording without generating a new recording, click the 'Pause' button ( ) instead. When clicking the pause button again, the recording will resume writing data to the same raw data file.
 |
 |
 |
| No raw data recording | Data recording active | Data recording paused |
Displaying raw data files
During recording, raw data will be displayed as a map display overlay. Note that at this stage, only the uncorrected raw depth (not elevation!) and position data are written to the display. Elevations and corrected values will only be displayed when the raw data has been converted to a sounding. However, if you are recording data with RTK tides enabled, you can show corrected data during the survey by enabling the "Display elevations" option in the display options window (see below).
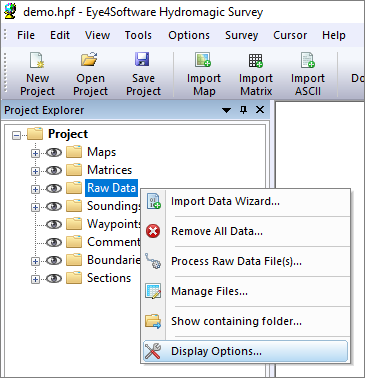
Right click the "Raw Data" folder and select "Display Options...".
To change the way raw data files are displayed (as track, positions, or depth values), right click on the "Raw Data" folder in the "Project Explorer" and select the "Display Options..." option. A dialog box is presented allowing you to specify how all raw data files are displayed on top of the background map:
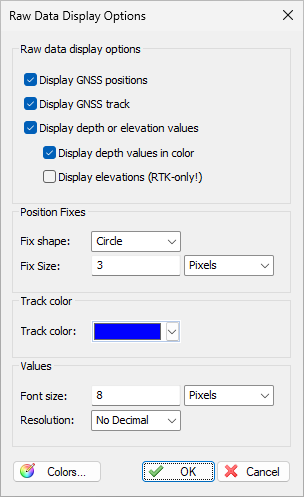
Customize the way raw data files are displayed.
Autosave option
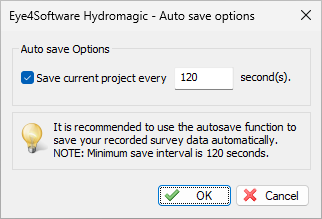
To prevent data loss, for instance, due to a PC crash or AC power failure, it is recommended to use the 'AutoSave' option. When this option is enabled, all project data (including raw data and sounding files) will be saved to disk at the specified interval.
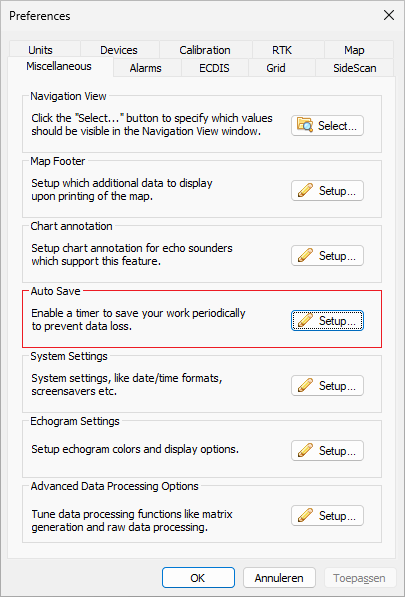
The autosave option is located at the "Miscellaneous" tab.
To change the autosave option, select 'Preferences...' from the 'Options' menu and click the 'Miscellaneous' tab. You will see an "Auto save" section at the bottom of this window. Now click the "Setup..." button in this section. Enable the checkbox if you want to use autosave, and enter an interval (minimum 1 minute). Click the "OK" button to apply the changes.
Make sure you enable the autosave function to prevent data-loss.
Manually saving raw data
Raw data files can be saved at any time by just clicking the "Save" button in the toolbar ( ). It will be saved into the "RawData" folder of your project.