
HYPACK raw data files
This can be used to transfer raw data recorded in Hydromagic to HYPACK. This may be useful for users who own a license for both software packages. Currently, Hydromagic can export single beam (sub-bottom) data as HYPACK raw data. The following data record types are supported when writing HYPACK raw data files:
- EC1 - Echo sounder record - single frequency;
- EC2 - Echo sounder record - dual frequency;
- POS - Position record;
- GYR - Gyro or compass record;
- RAW - Raw position data;
- QUA - GNSS Quality data record;
- TID - Tide observation record;
- MSG - Trace information (NMEA0183);
- HCP - Motion sensor data record.
Starting the HYPACK export tool
The HYPACK export tool can only be started from the "Raw Data File Manager" in Hydromagic Survey. This option is not available in Hydromagic Dredging, since no raw data files are used in this application. First open the "Raw Data File Manager" by right-clicking the "Raw Data" folder in the "Project Explorer". From the pop-up menu which appears, select the "Manage Files..." option.
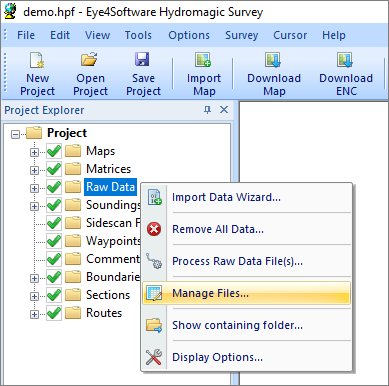
Right click the "Raw Data" folder and select "Manage Files...".
In the "Raw Data File Manager", multiple export options are offered, including HYPACK, SEG-Y and XTF format. Using the exporting tools, you can export one or more files. Select the raw data files you want to export and click the "Export HYPACK" button to start the HYPACK export tool.
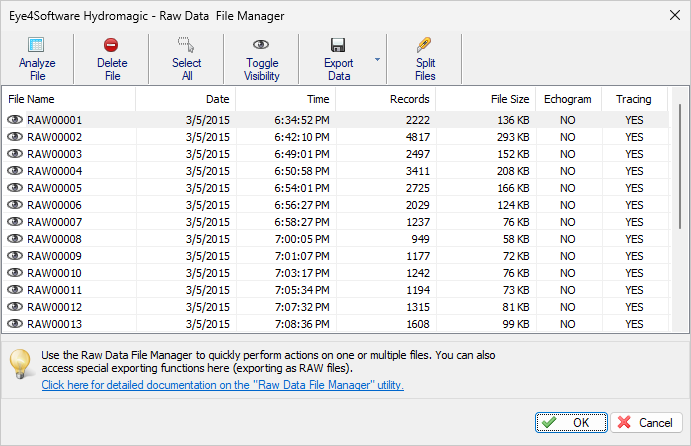
The raw data files manager shows a list of raw data files in the project.
Select output folder
Click the "Browse..." button to select in which folder the HYPACK files will be written. By default, the 'Exports' folder in your project map will be used unless you selected another folder previously. When one or more files already exist you will be notified. To force the replacement of existing files, check the 'Overwrite existing files without warning' checkbox.
Select file(s) to export
If you didn't select any files from the 'Raw Data File Manager' tool before opening the HYPACK export tool, you can select the files to export by clicking the 'Select...' button. From the window that opens, you can select the files to be exported by setting the checkboxes.
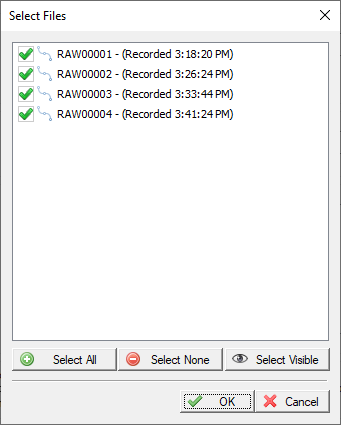
Select which raw data files will be included in the export.
Projection
The tool will automatically select a suitable UTM projection when exporting the data. The tool is limited to UTM zones only, to avoid interchangeability issues. Please make sure that the imported raw data files are all in the same UTM zone. After selecting the raw data files to export, the tool will show the detected UTM zone.
Click the 'OK' button to start the export process. If the export process did not complete successfully, you can refer to the activity view for more details on the error shown.
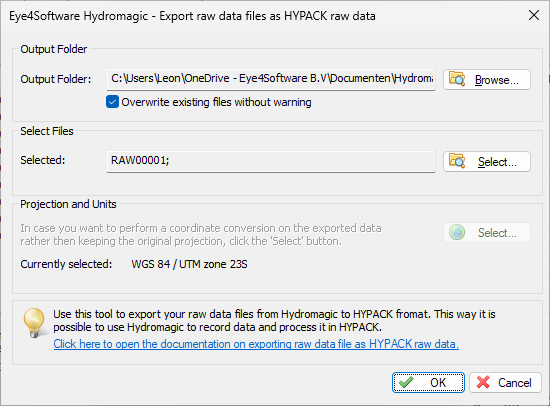
After selecting the raw data files, the detected UTM zone will be displayed.
Exported Files
When the export process finishes, the folder containing the exported HYPACK files will be opened in 'Windows Explorer'. The first three digits of the filename indicate the number of the original raw data file, and the last four digits indicate the starting time of the recorded data. When importing the data into HYPACK, you only have to select the generated .log file (Demo.log in this example).
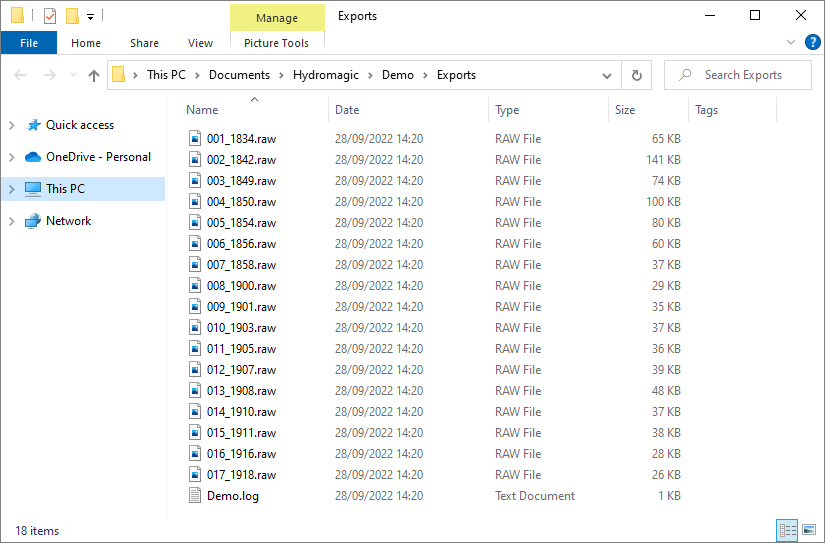
The exported HYPACK files will be written to the Export folder by default.
Video Tutorial
The following YouTube video tutorial shows how to export Hydromagic raw data files as HYPACK raw data files. Click below to play the video. When you like the video, please click the like button and subscribe so you will receive an update when new video tutorials on Hydromagic are uploaded.
Hydromagic can export raw data as HYPACK raw data files.